How to Connect Steam Deck to UGame C2 ProUpdated 5 months ago
If you're looking to connect your Steam Deck to the UGame C2 Pro portable monitor, this guide will walk you through the entire process, from setting up the monitor to adjusting the settings for an optimal experience.
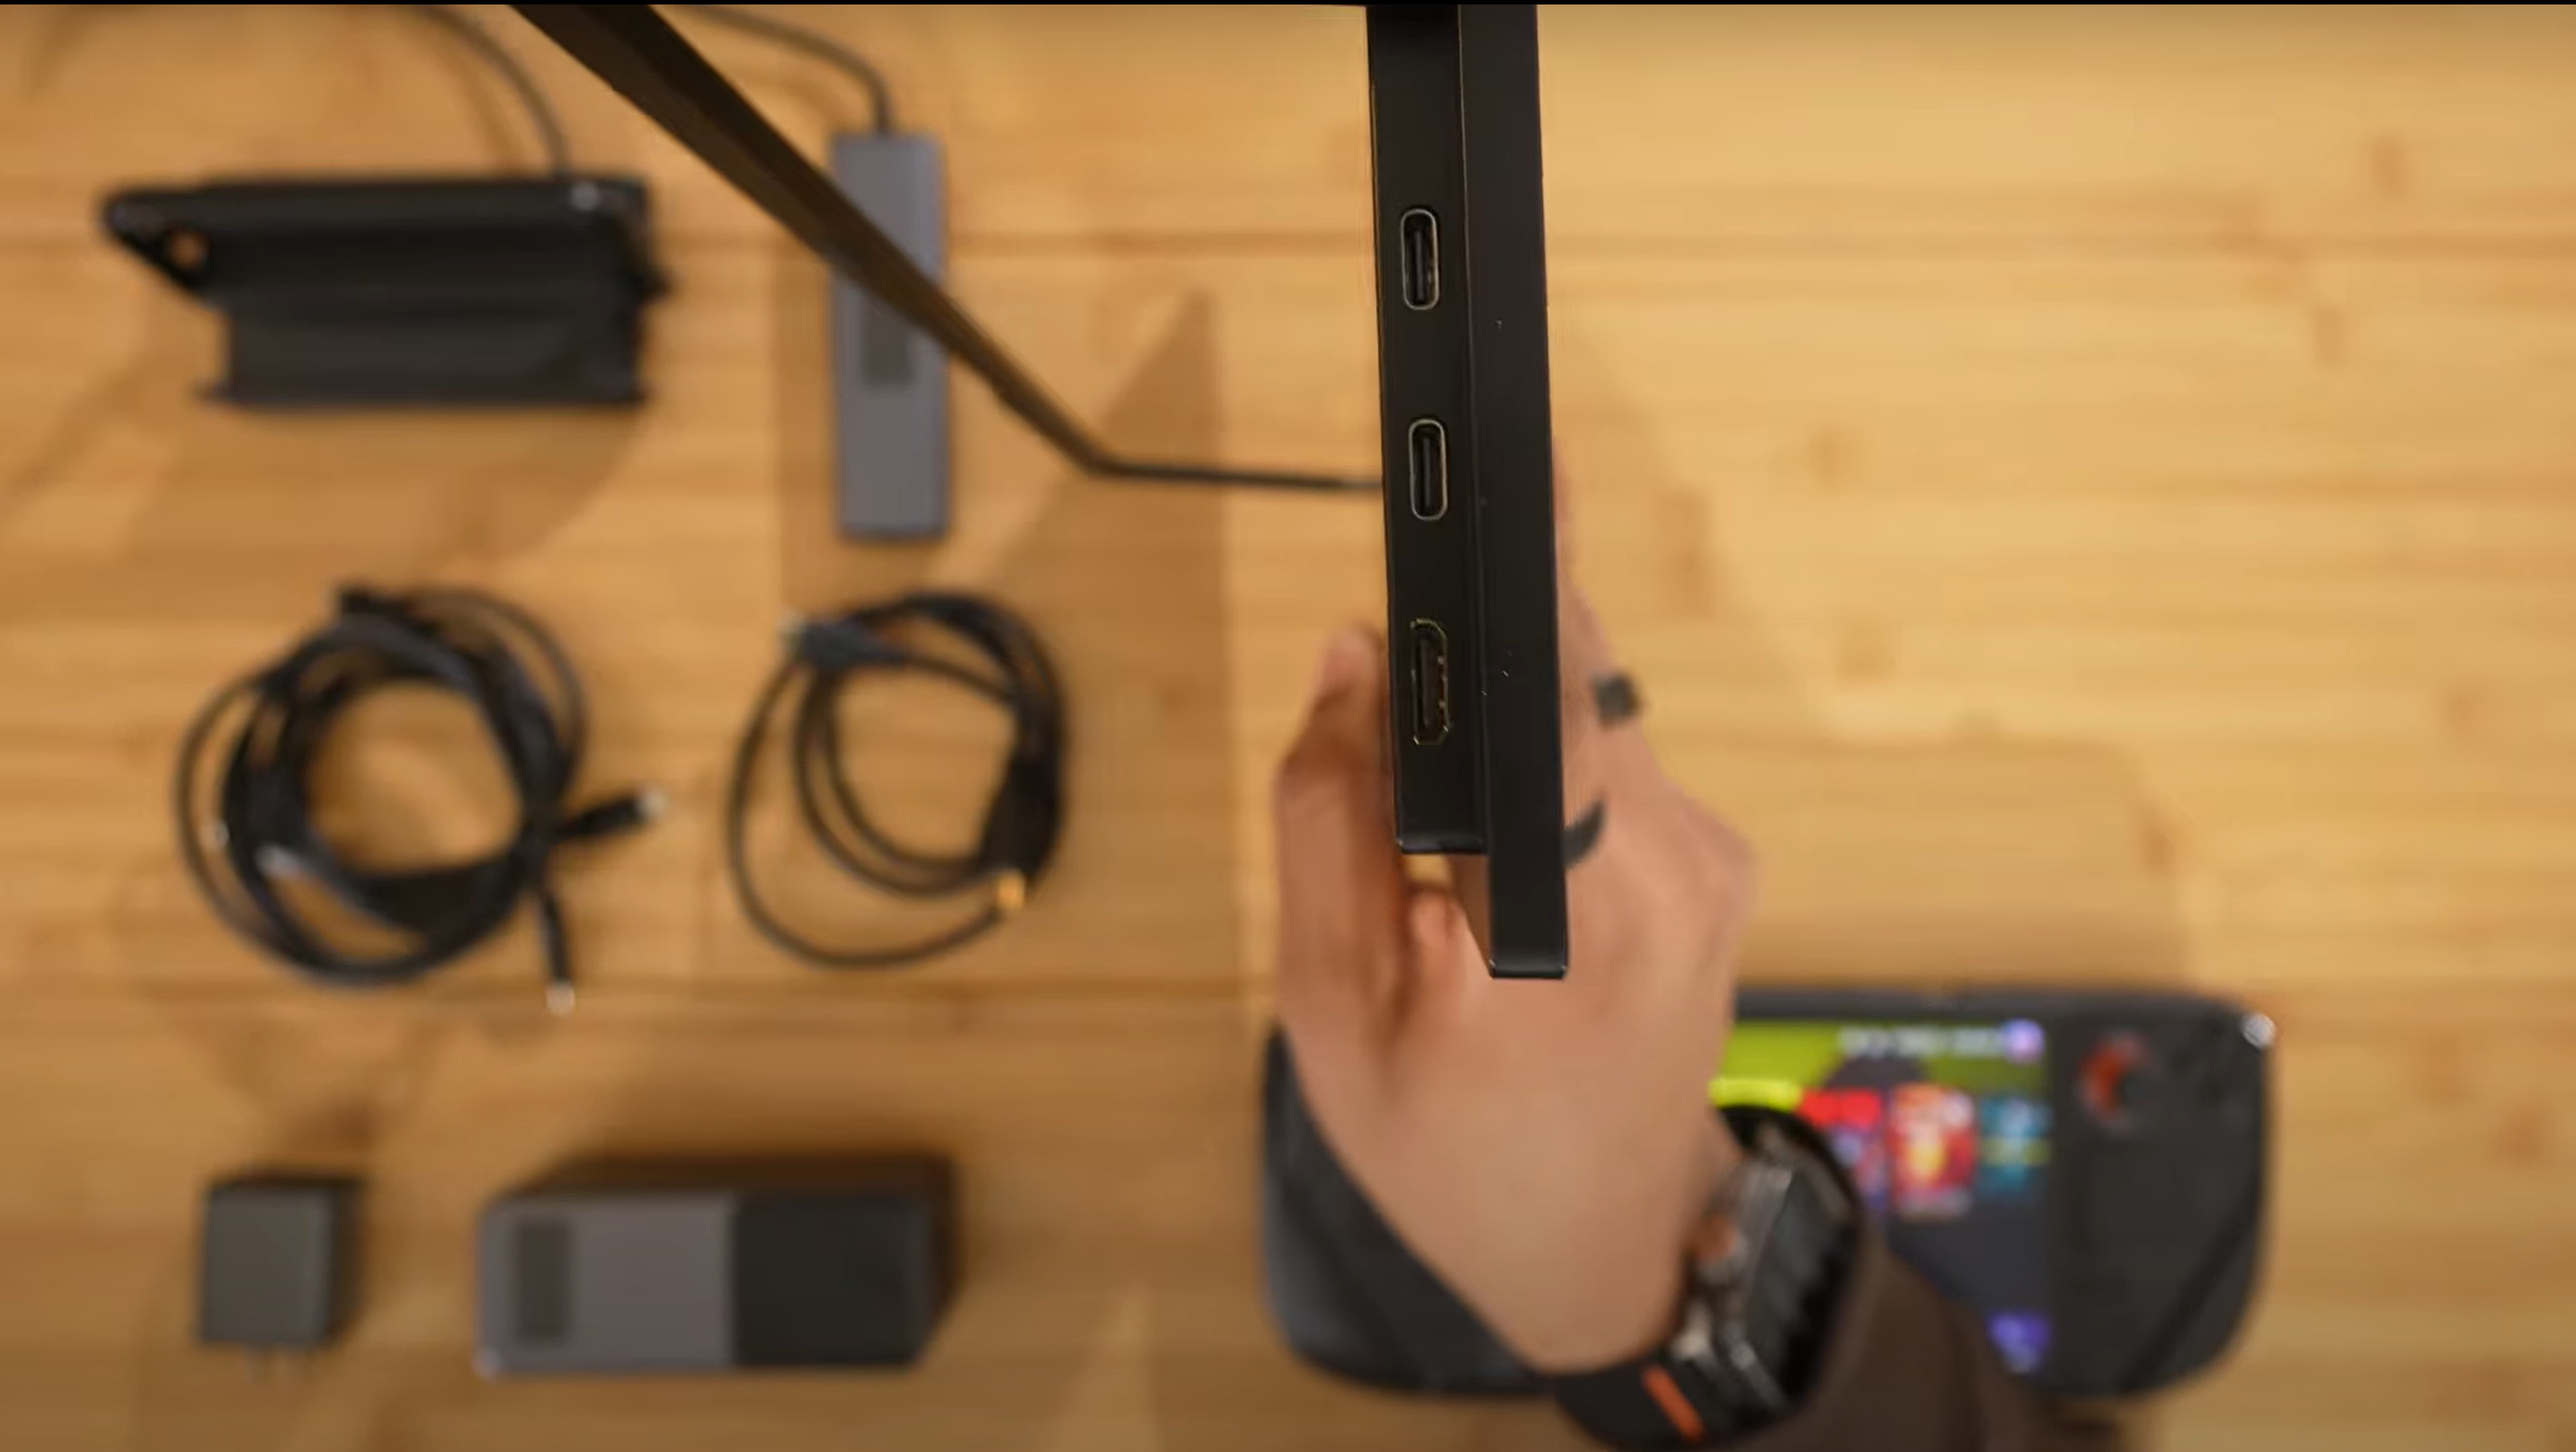
Step 1: Overview of the UGame C2 Pro Monitor
Before jumping into the connection process, let's take a quick look at the monitor.
- Ports & Buttons:
- On the side of the monitor, you'll find two USB-C portsand a mini HDMI port.
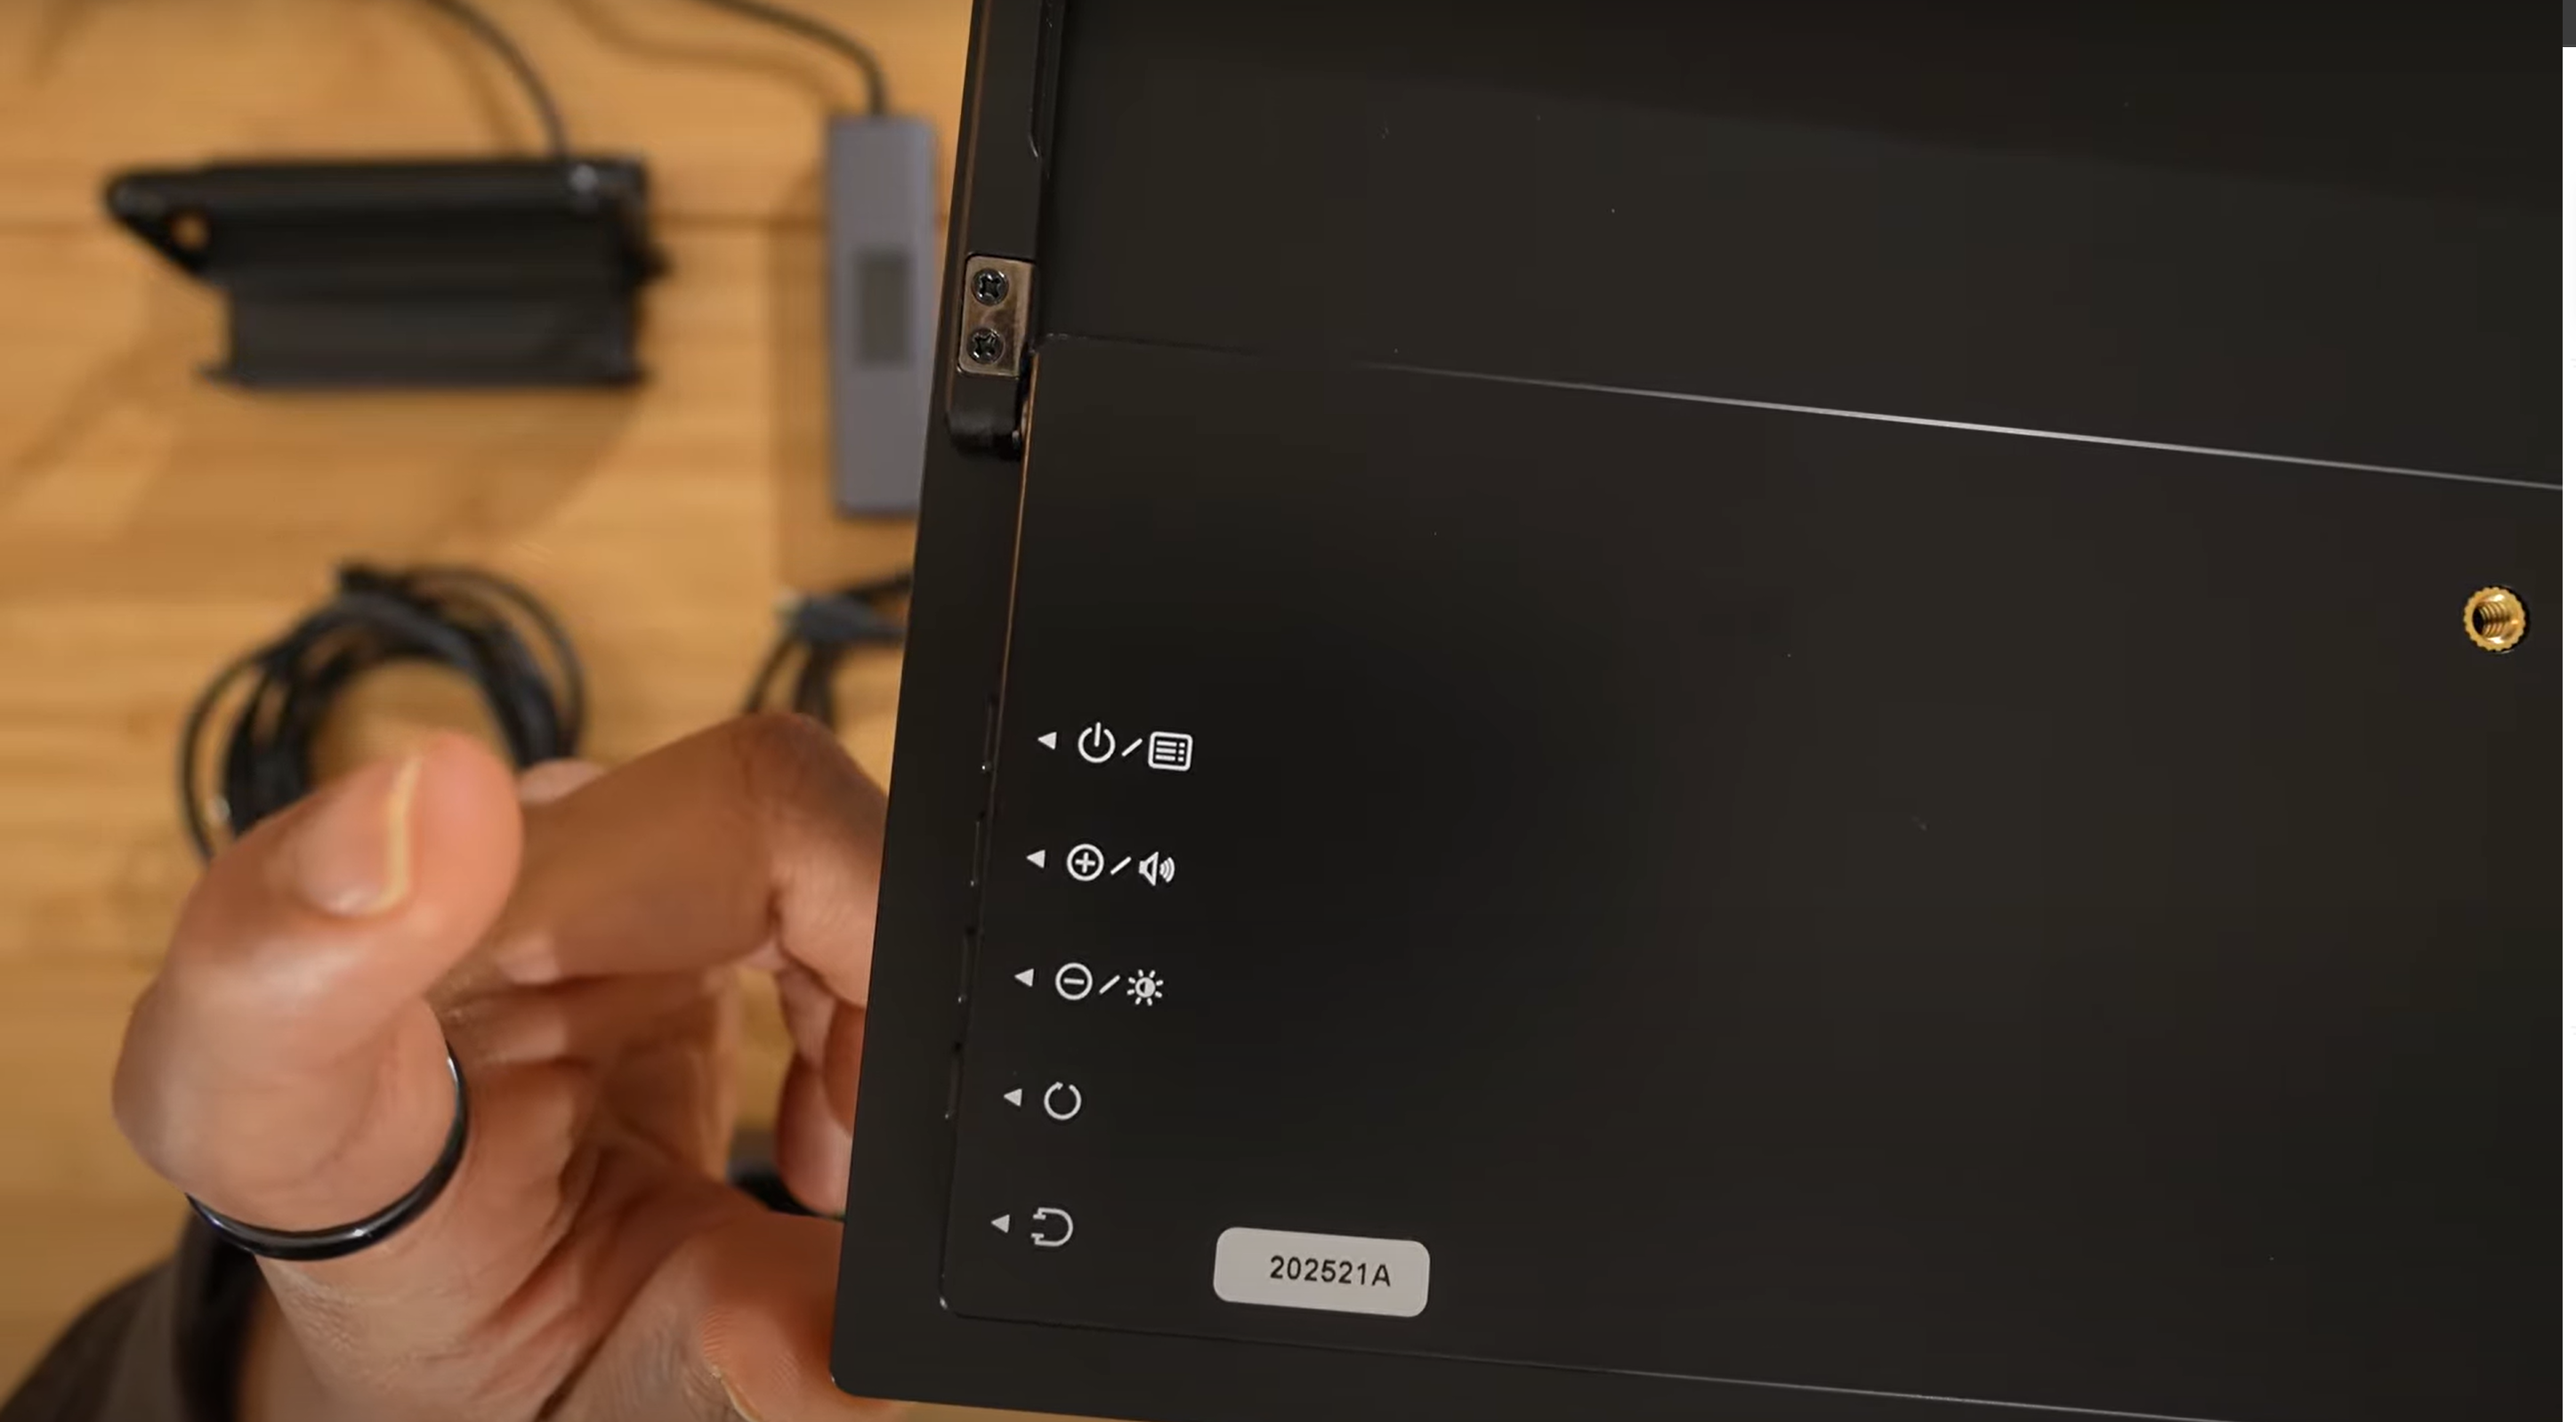
- The buttonson the back include:
- Power/Menu button(top button),
- Volume upand Volume down buttons,
- Brightness upand Brightness down buttons,
- Back/Cancel button.
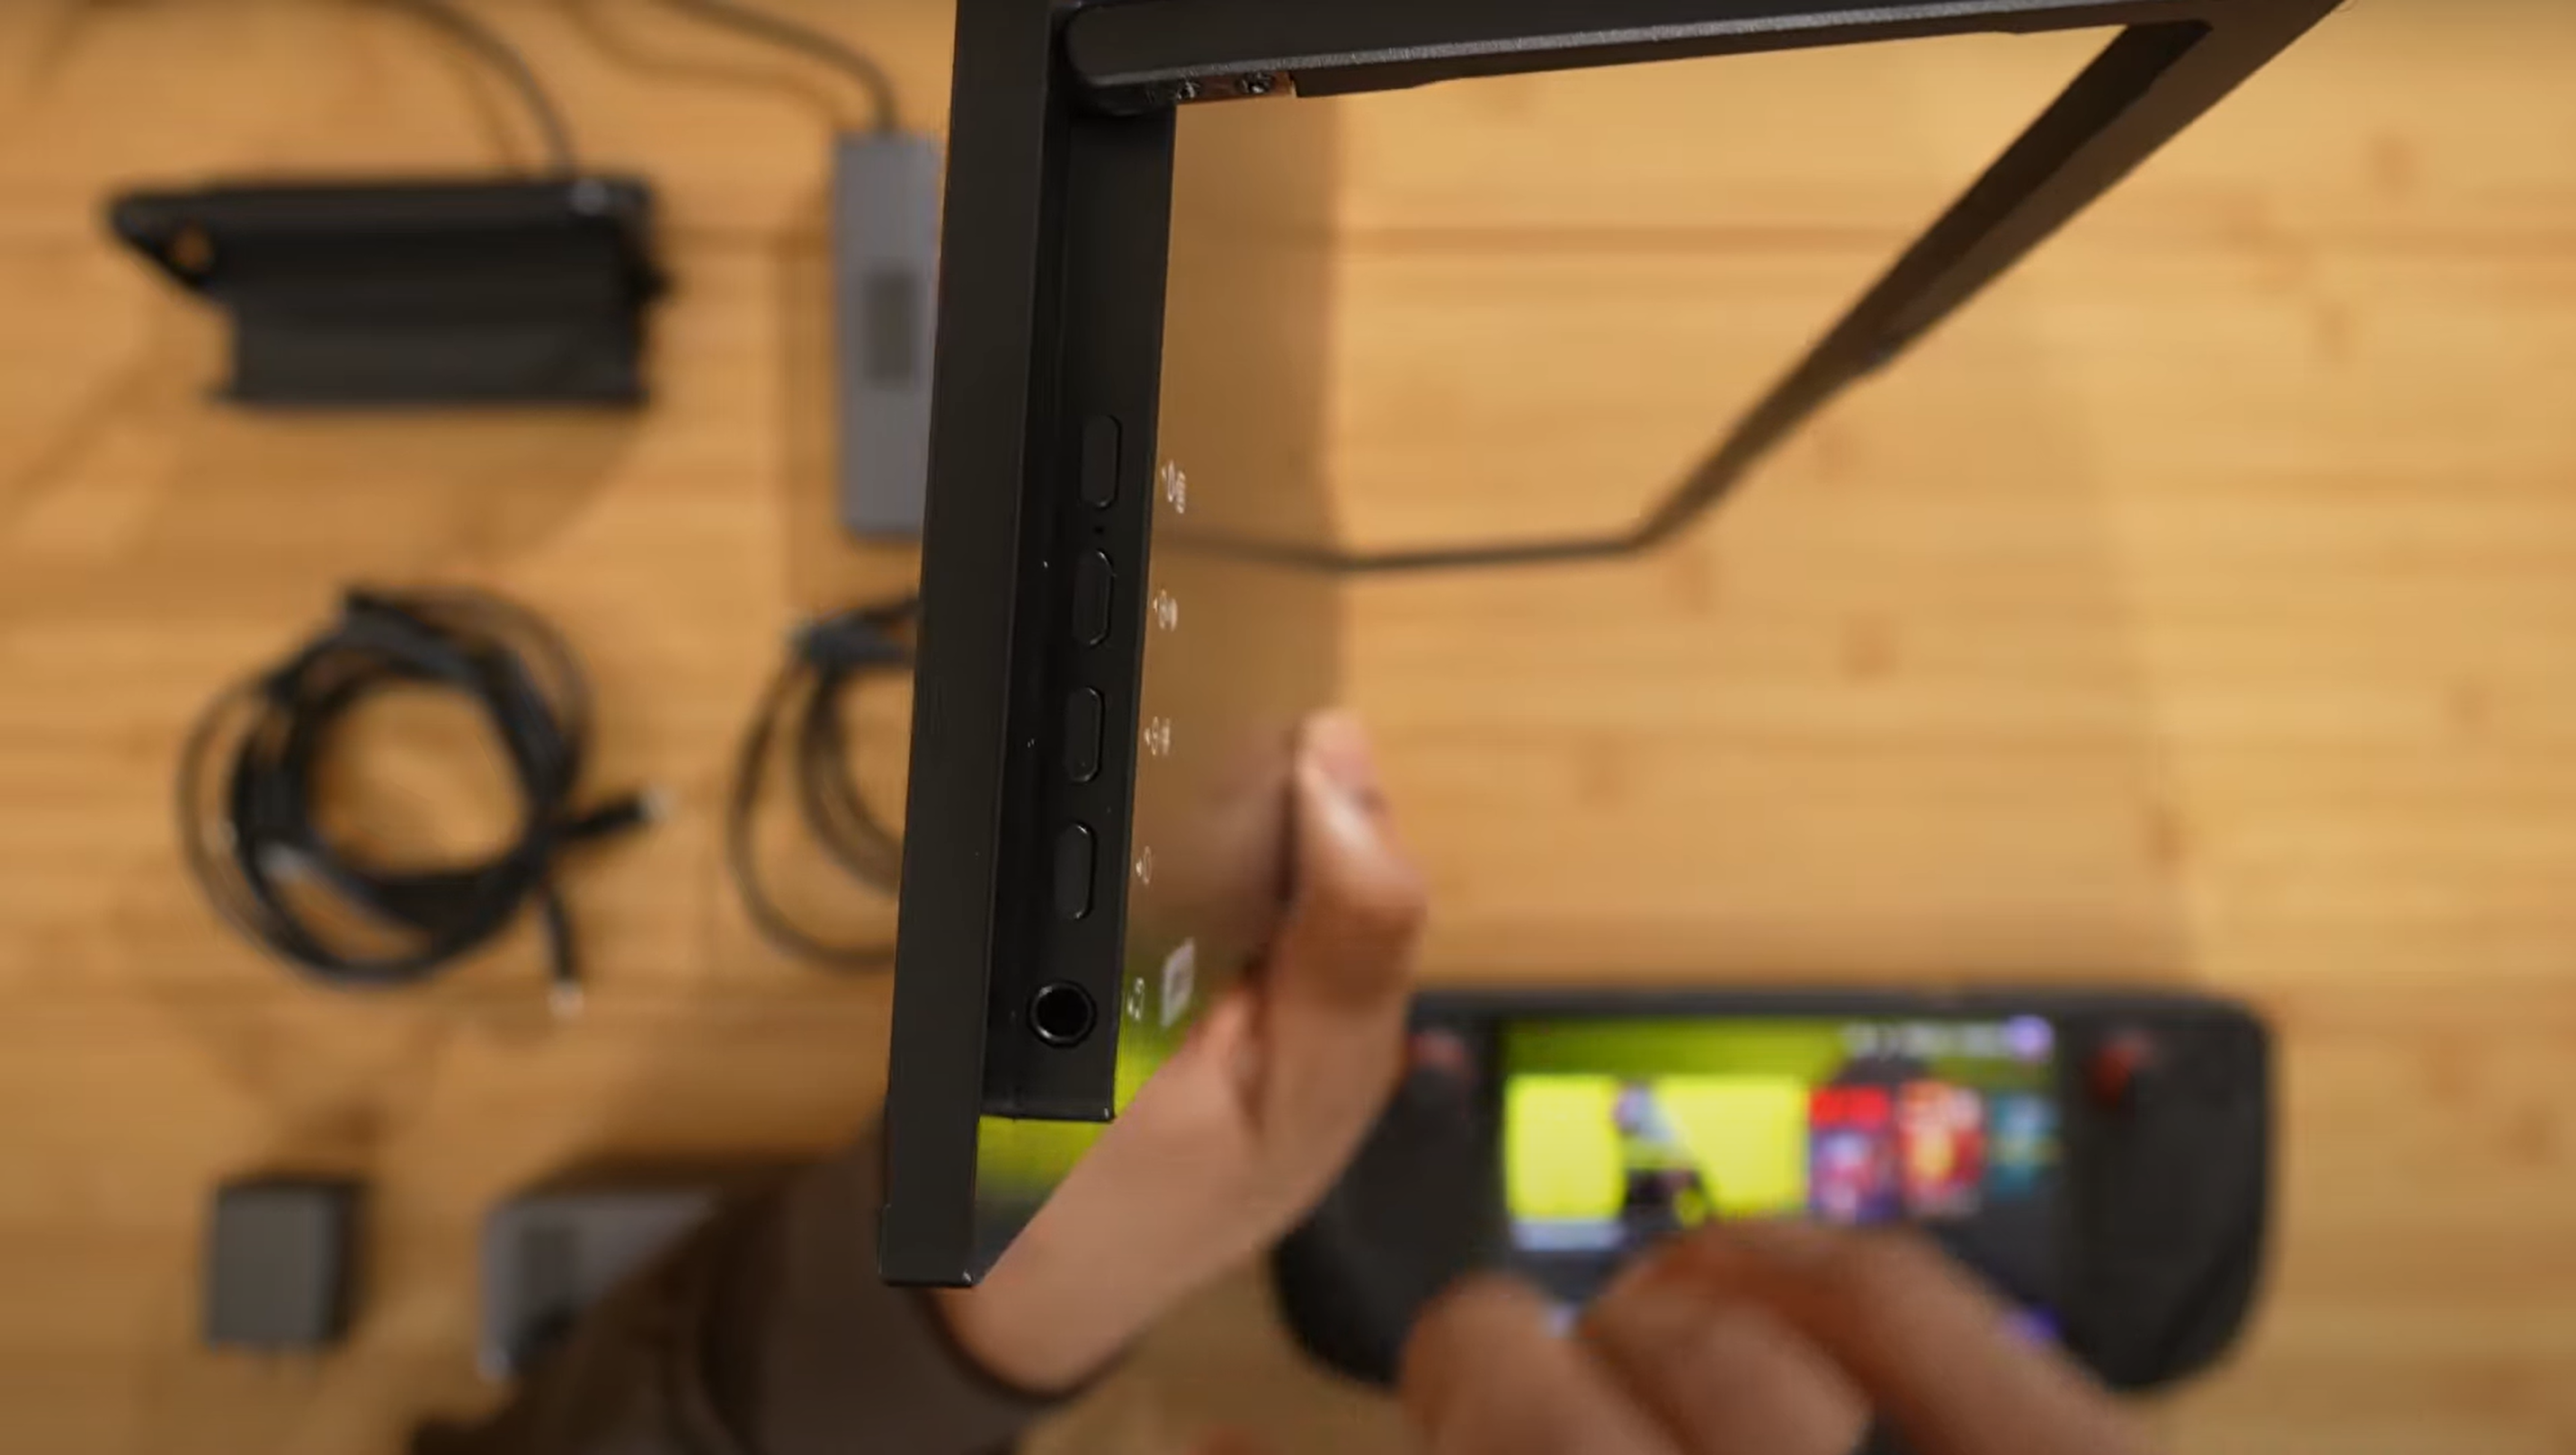
- Stand:
- The stand on this monitor is adjustable. Simply lift the stand to reveal the ports.
Step 2: Connecting the Steam Deck to the Monitor
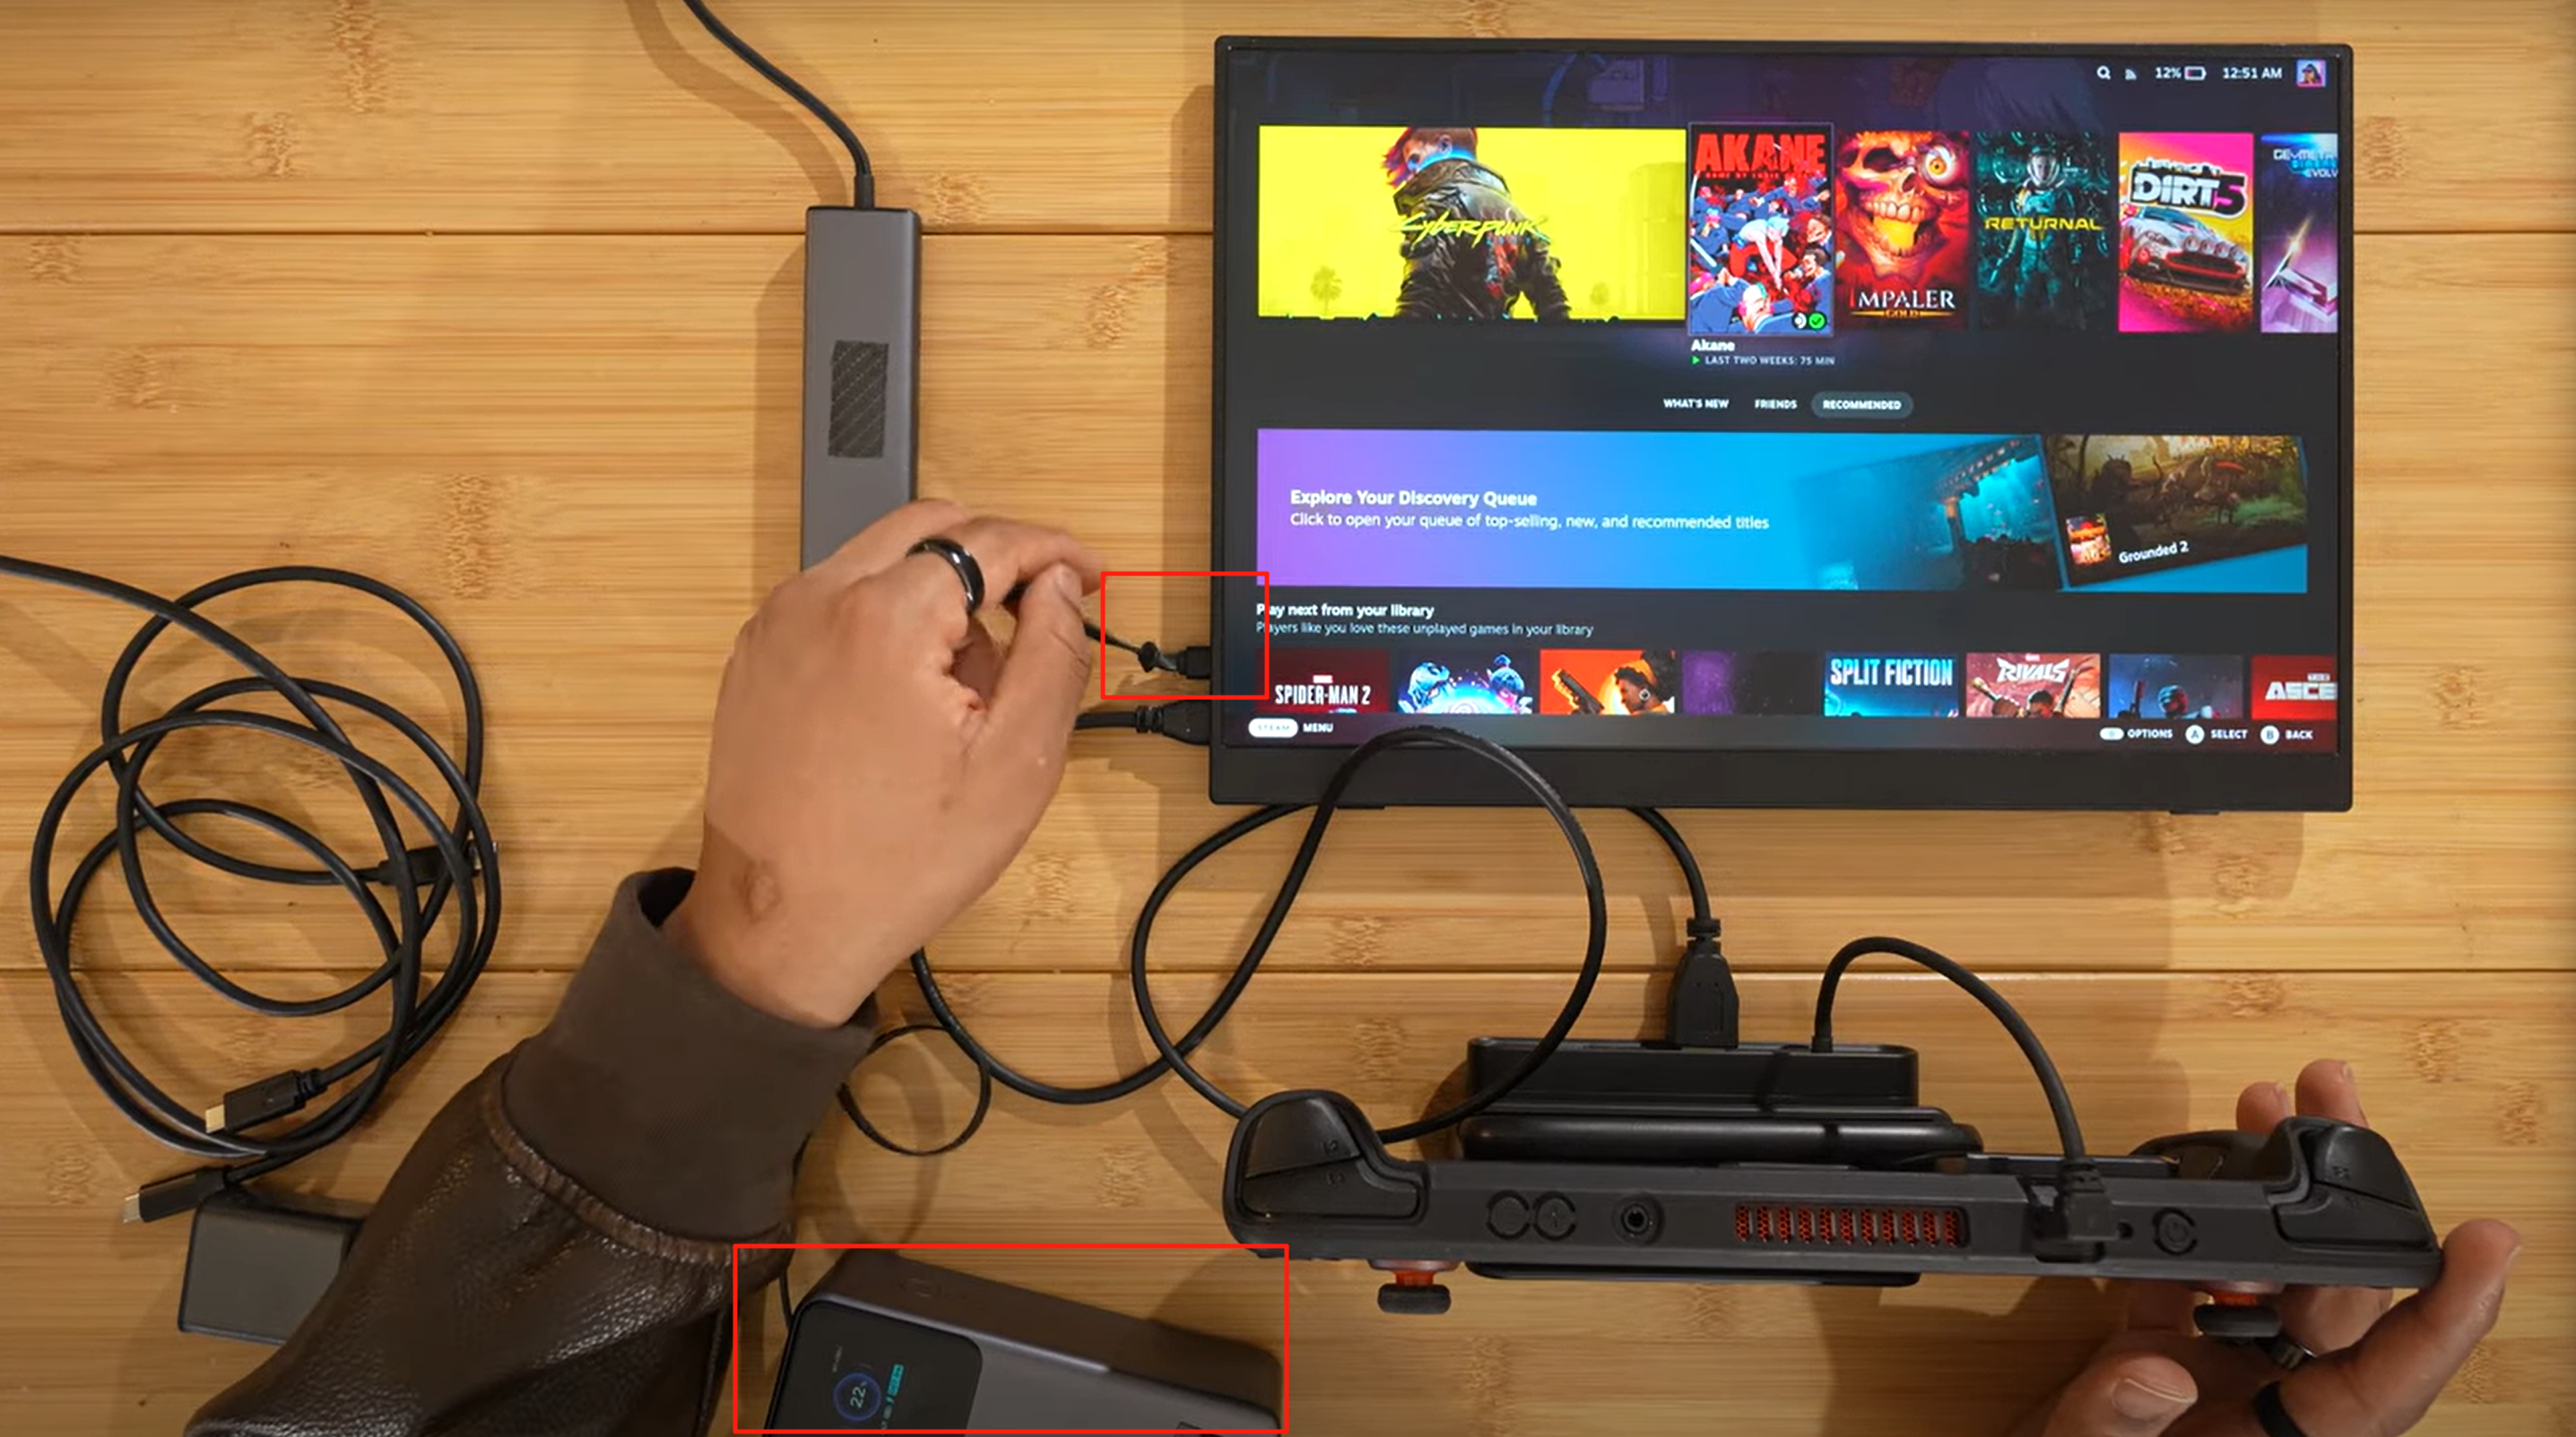
Method 1: Single USB-C Cable (Easiest Method)
- Plug the USB-C Cable:
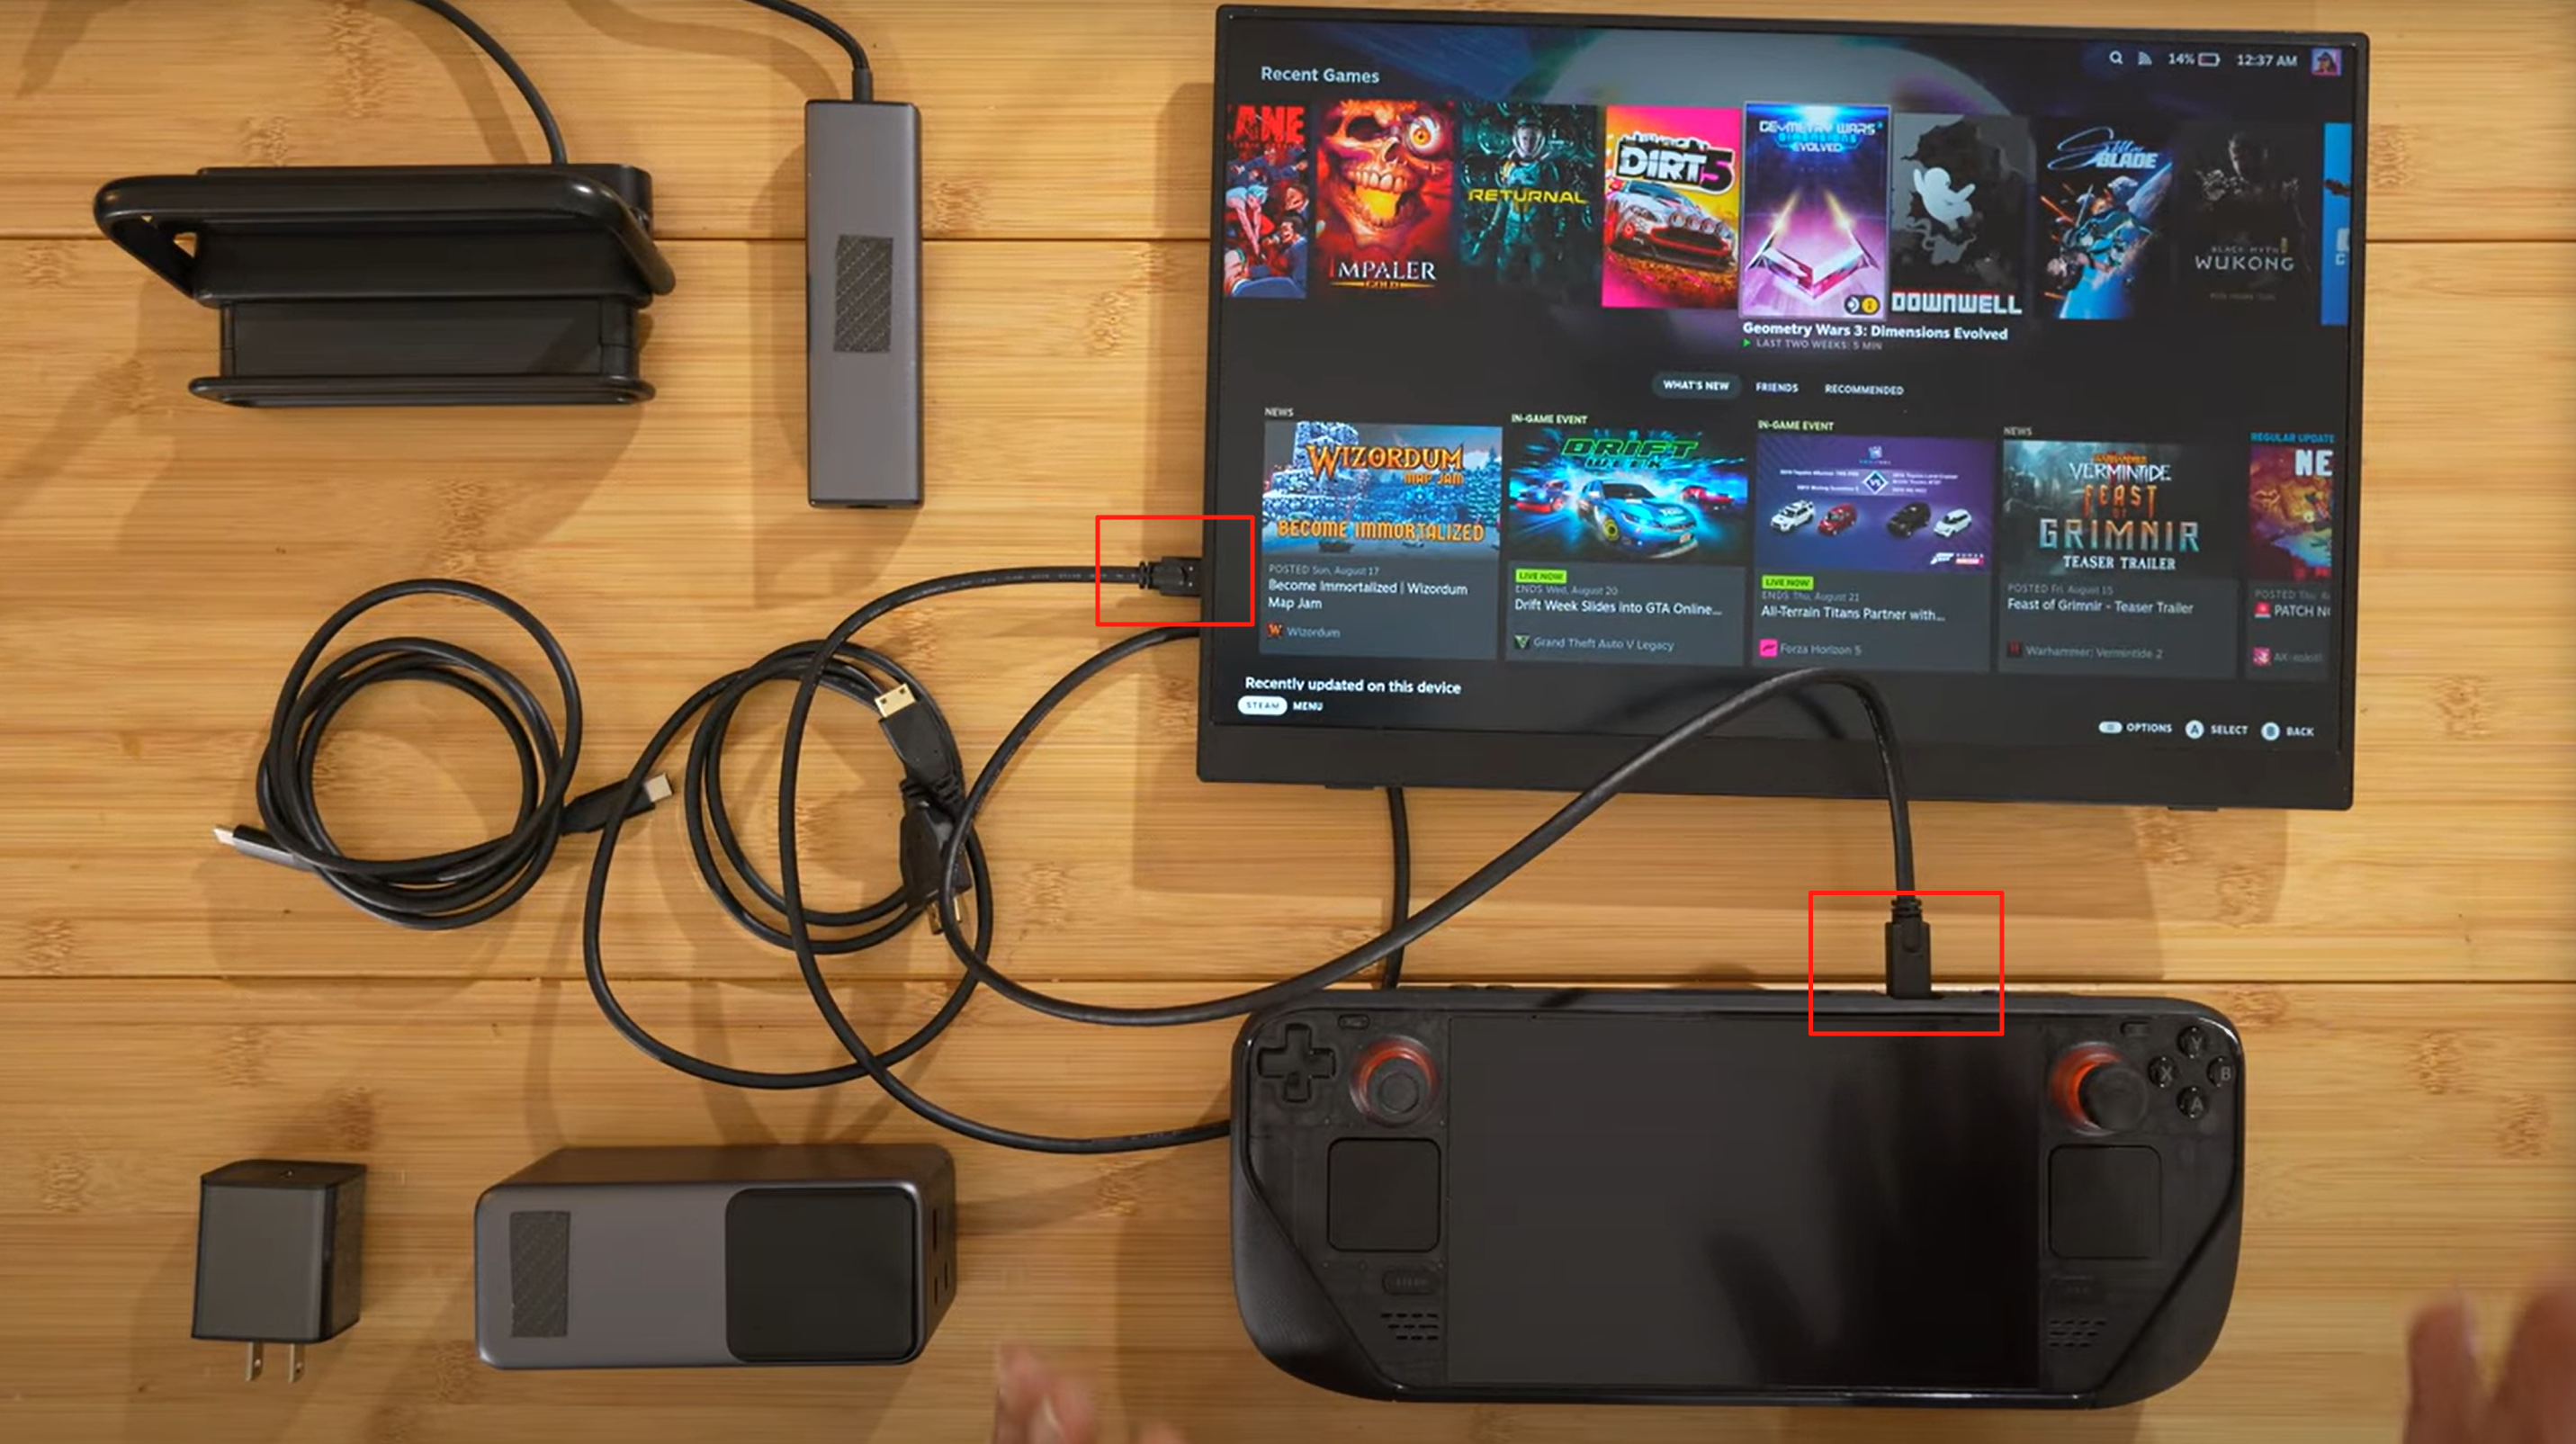
- Connect one end of the USB-C cable to one of the two USB-C ports on the UPERFECT monitor.
- Plug the other end into the USB-C portof your Steam Deck.
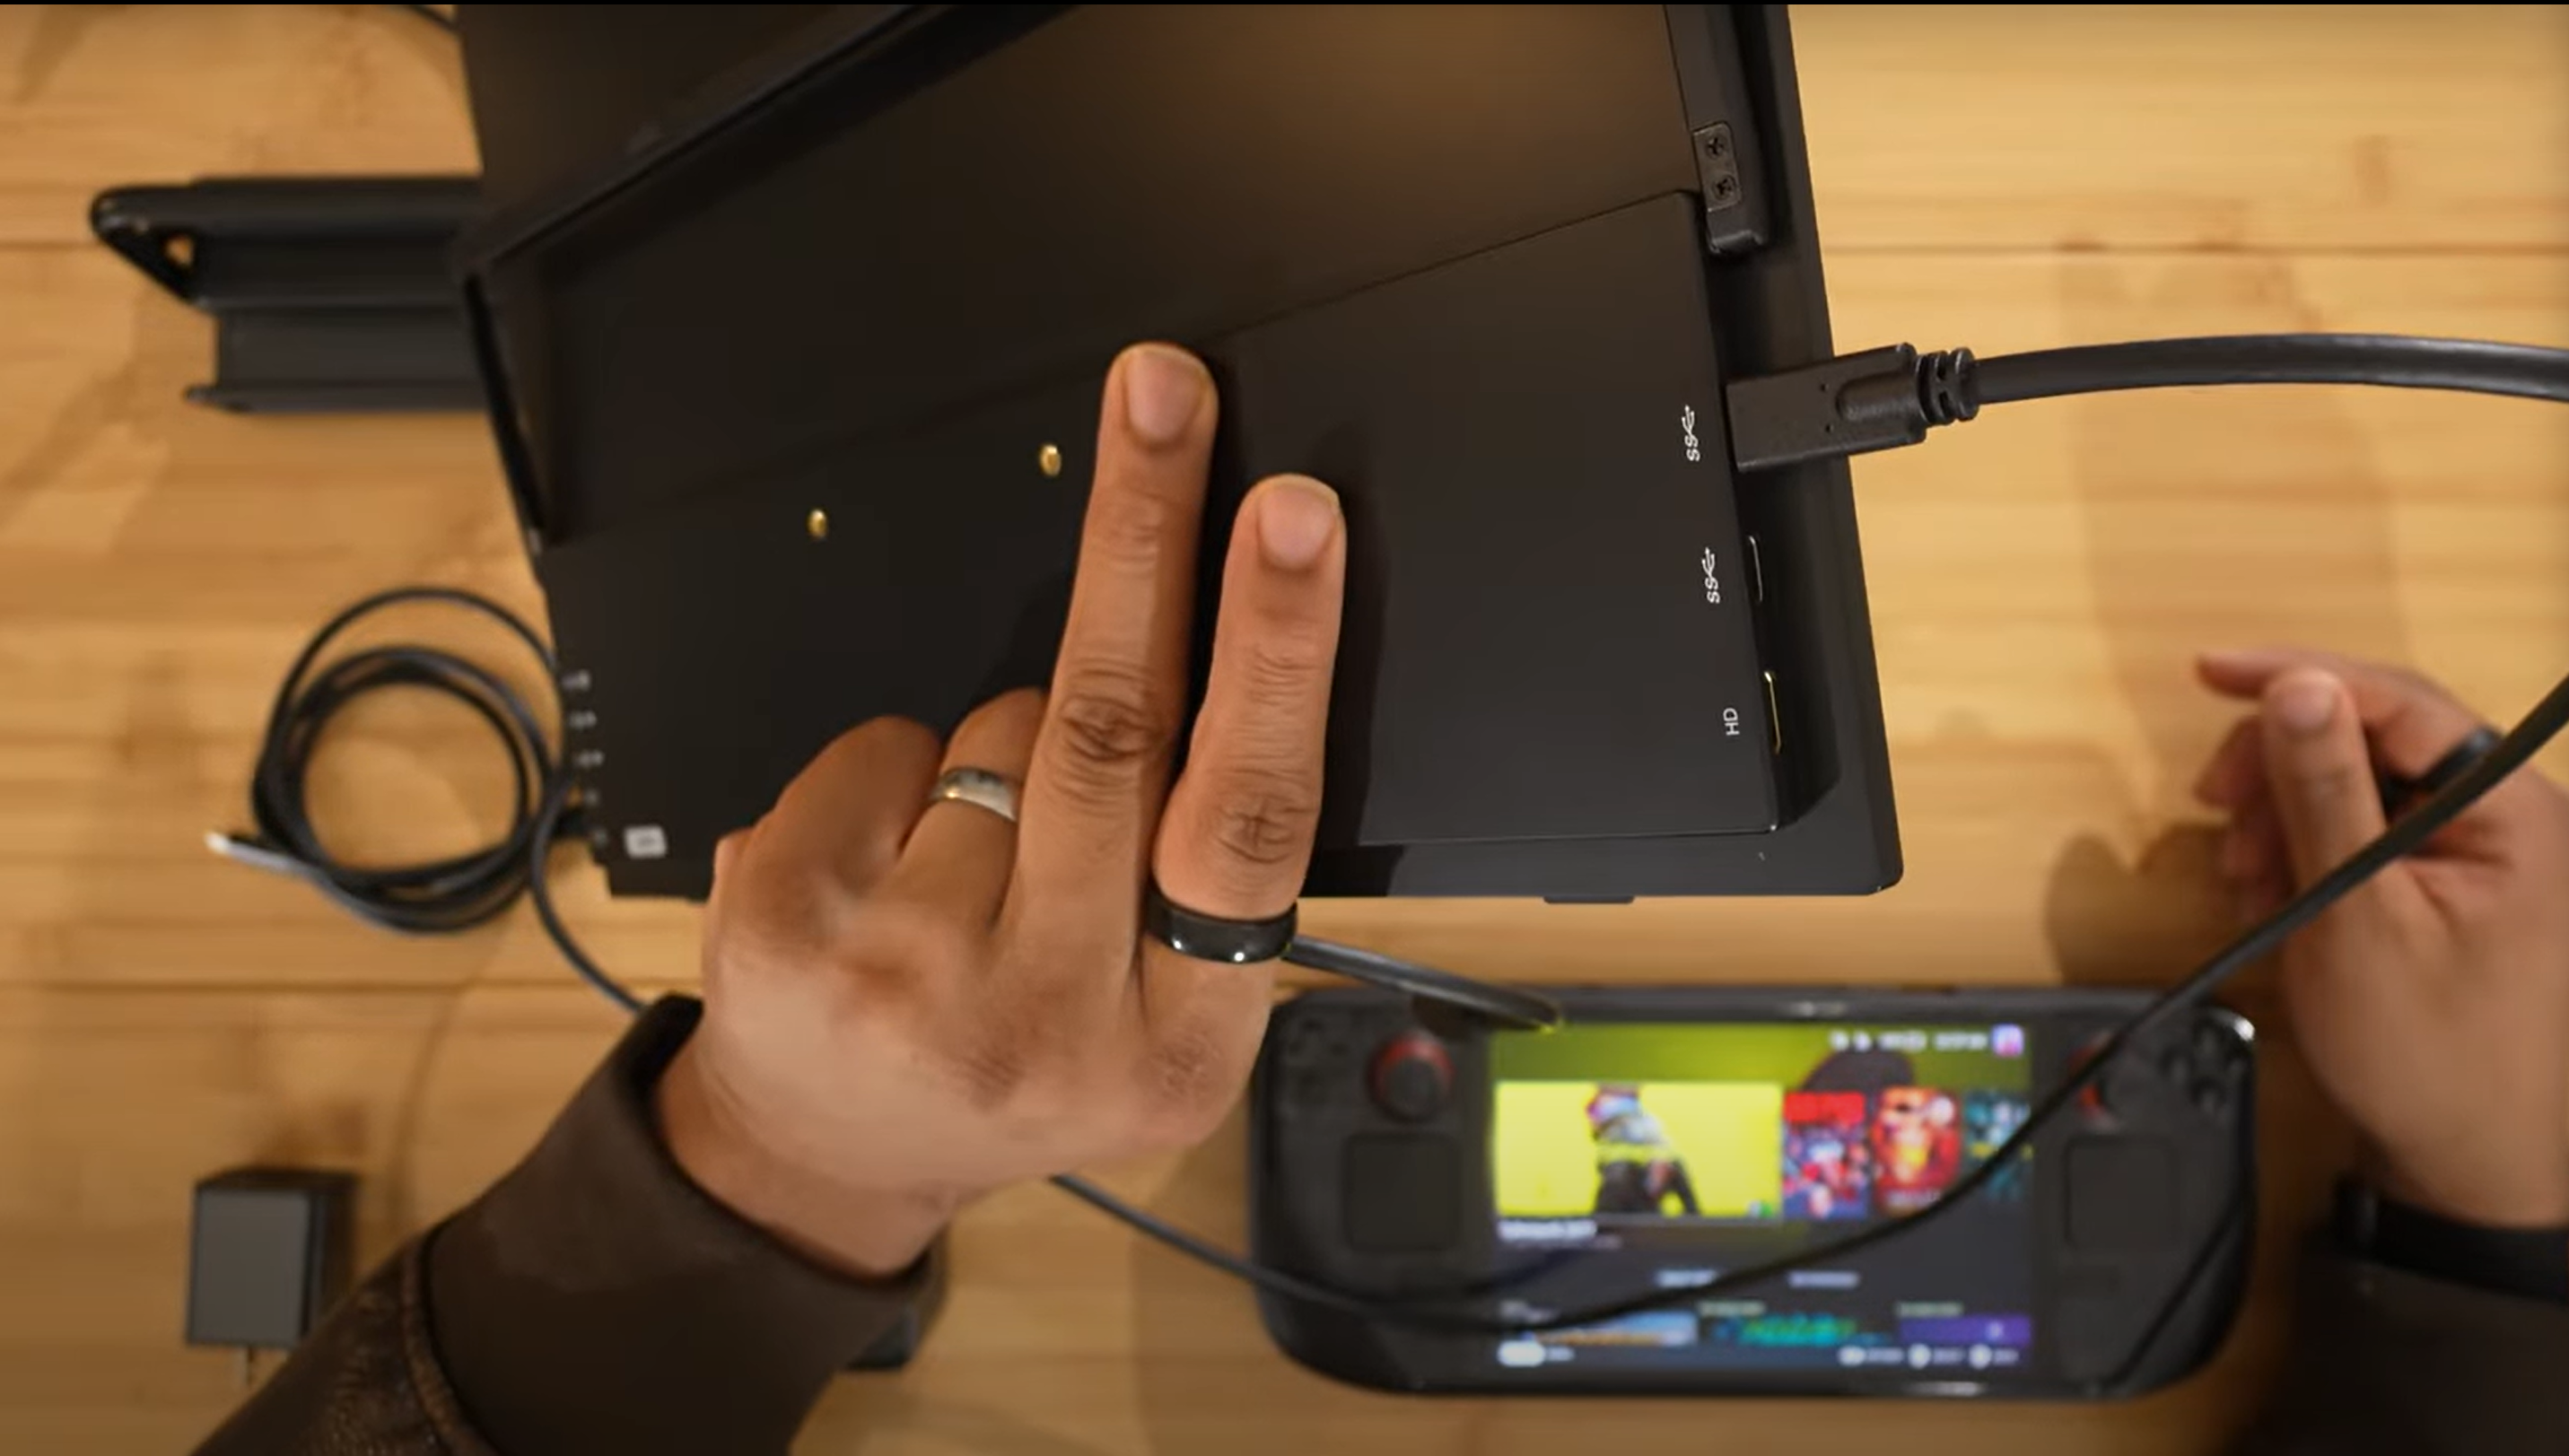
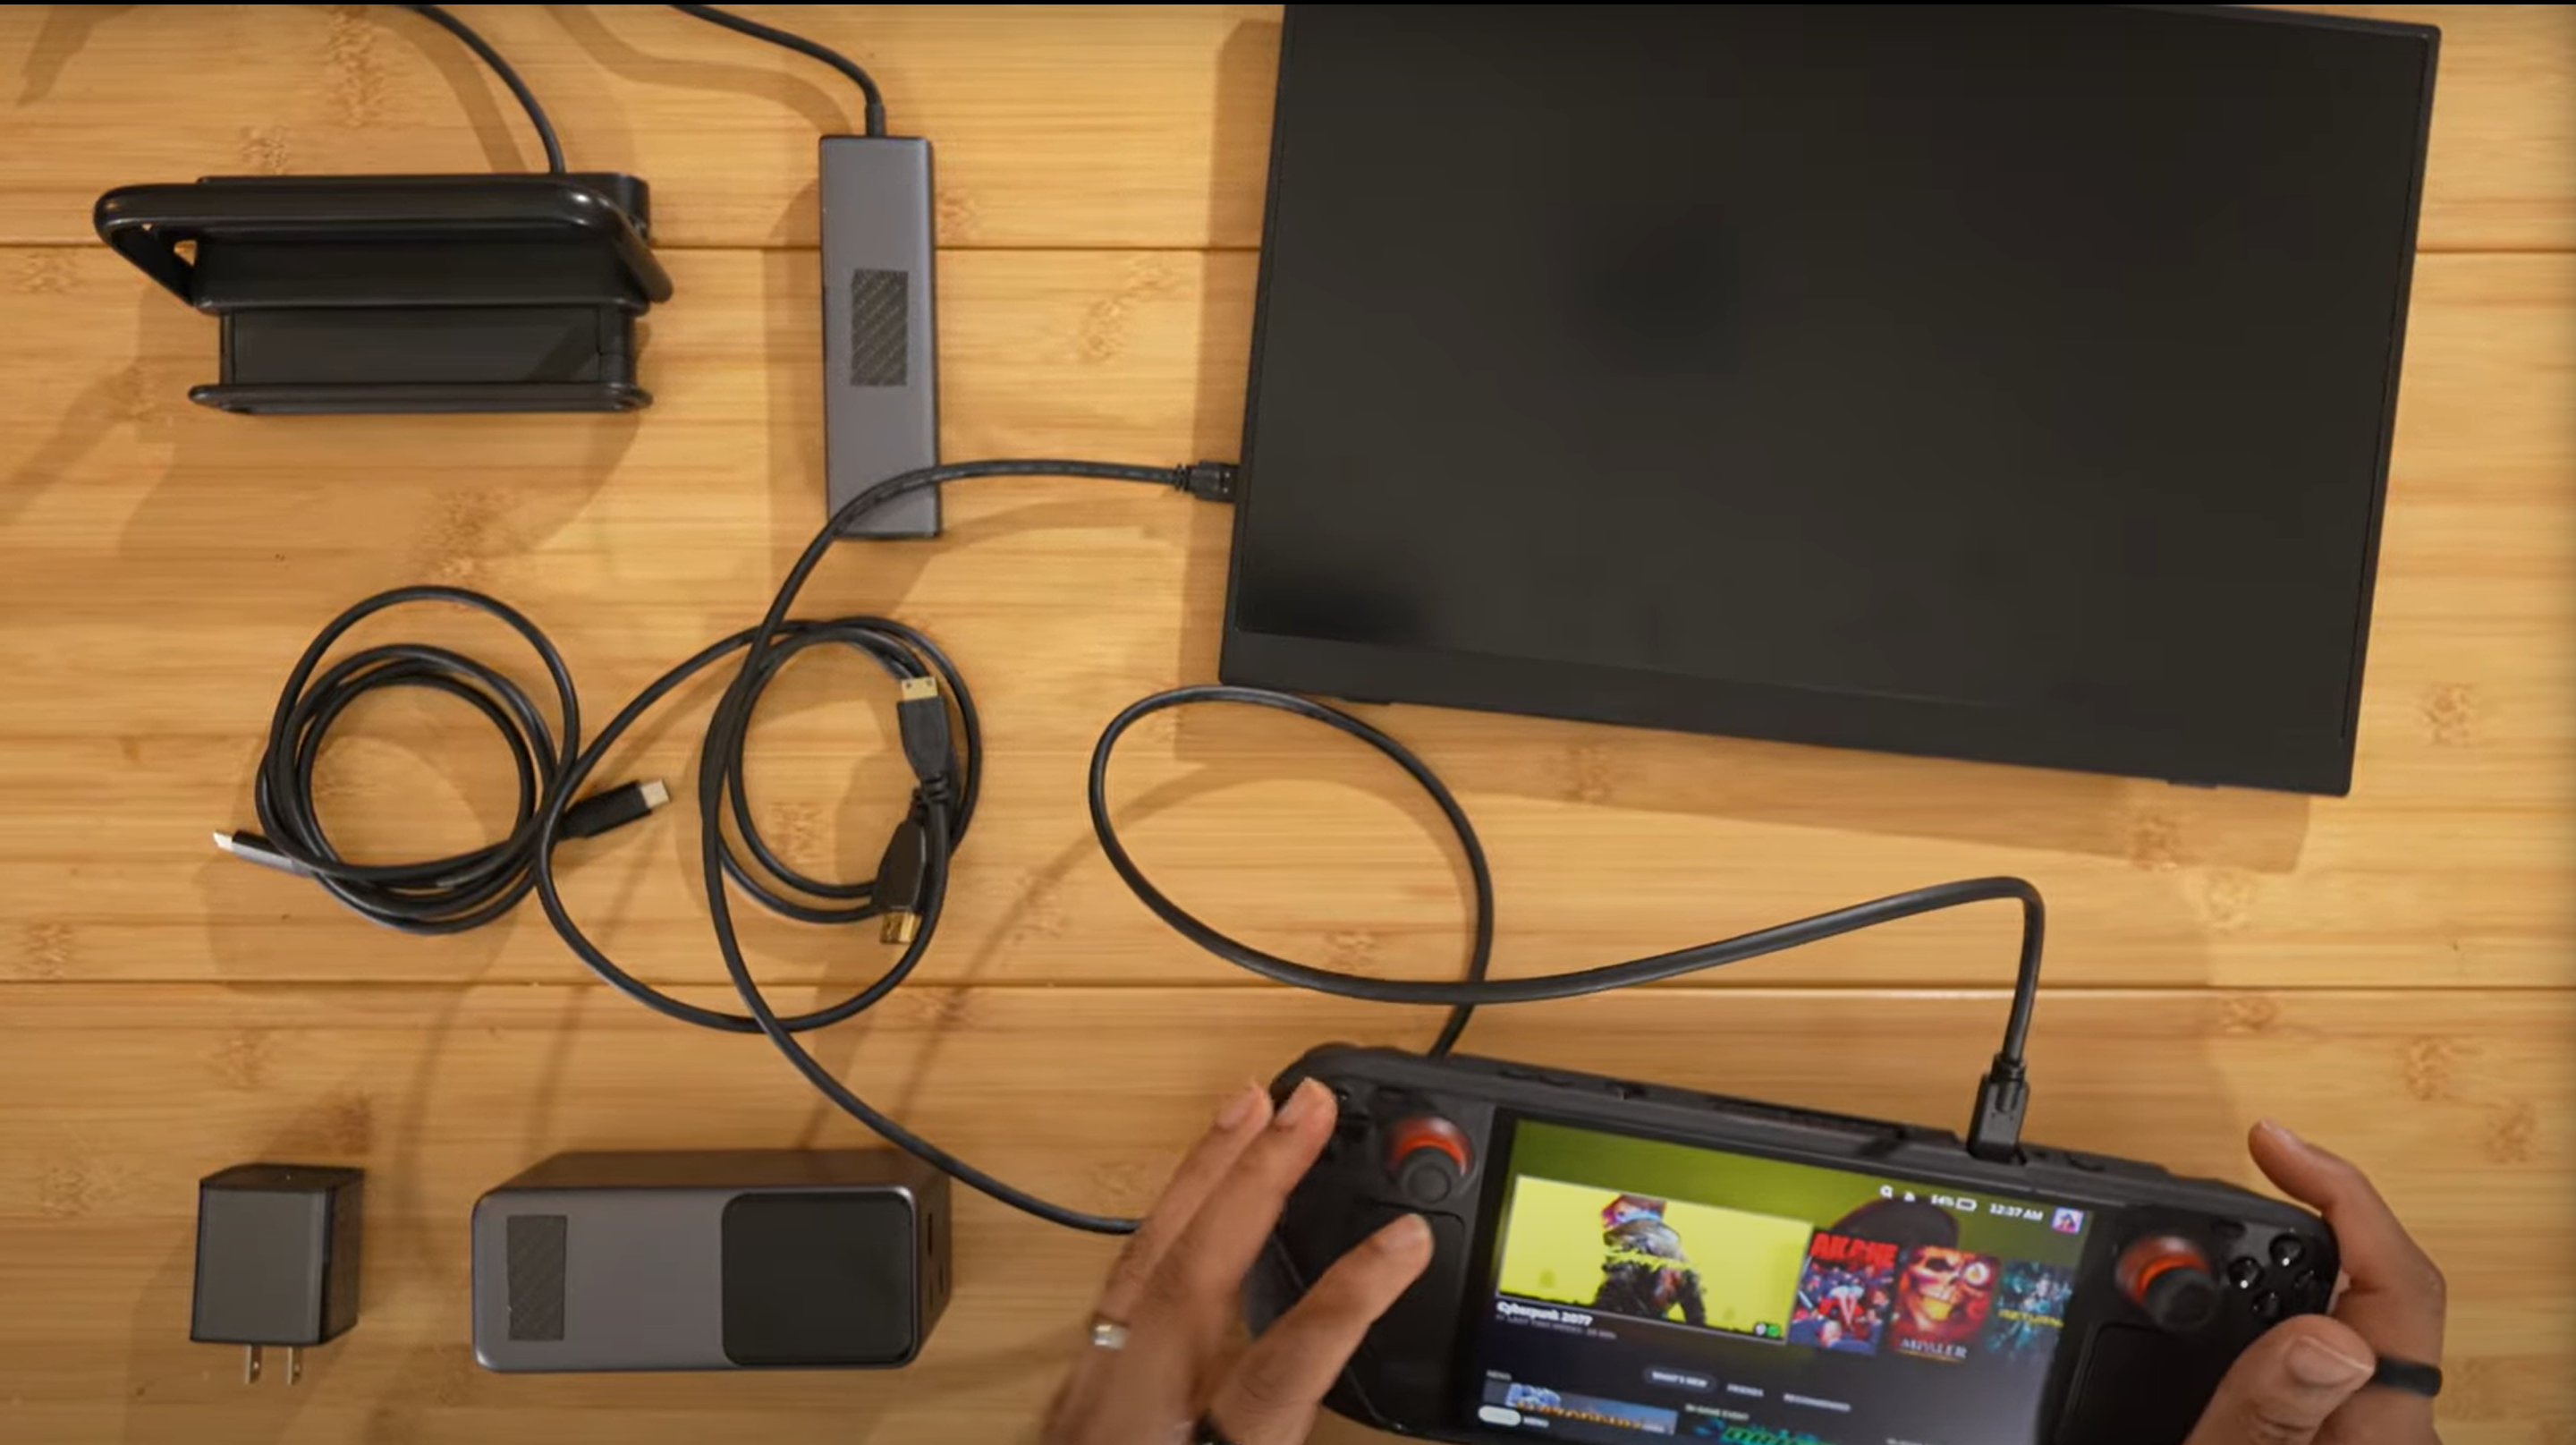
- Power on:
- The monitor will automatically start displaying the Steam Deck’s interface within a few seconds.
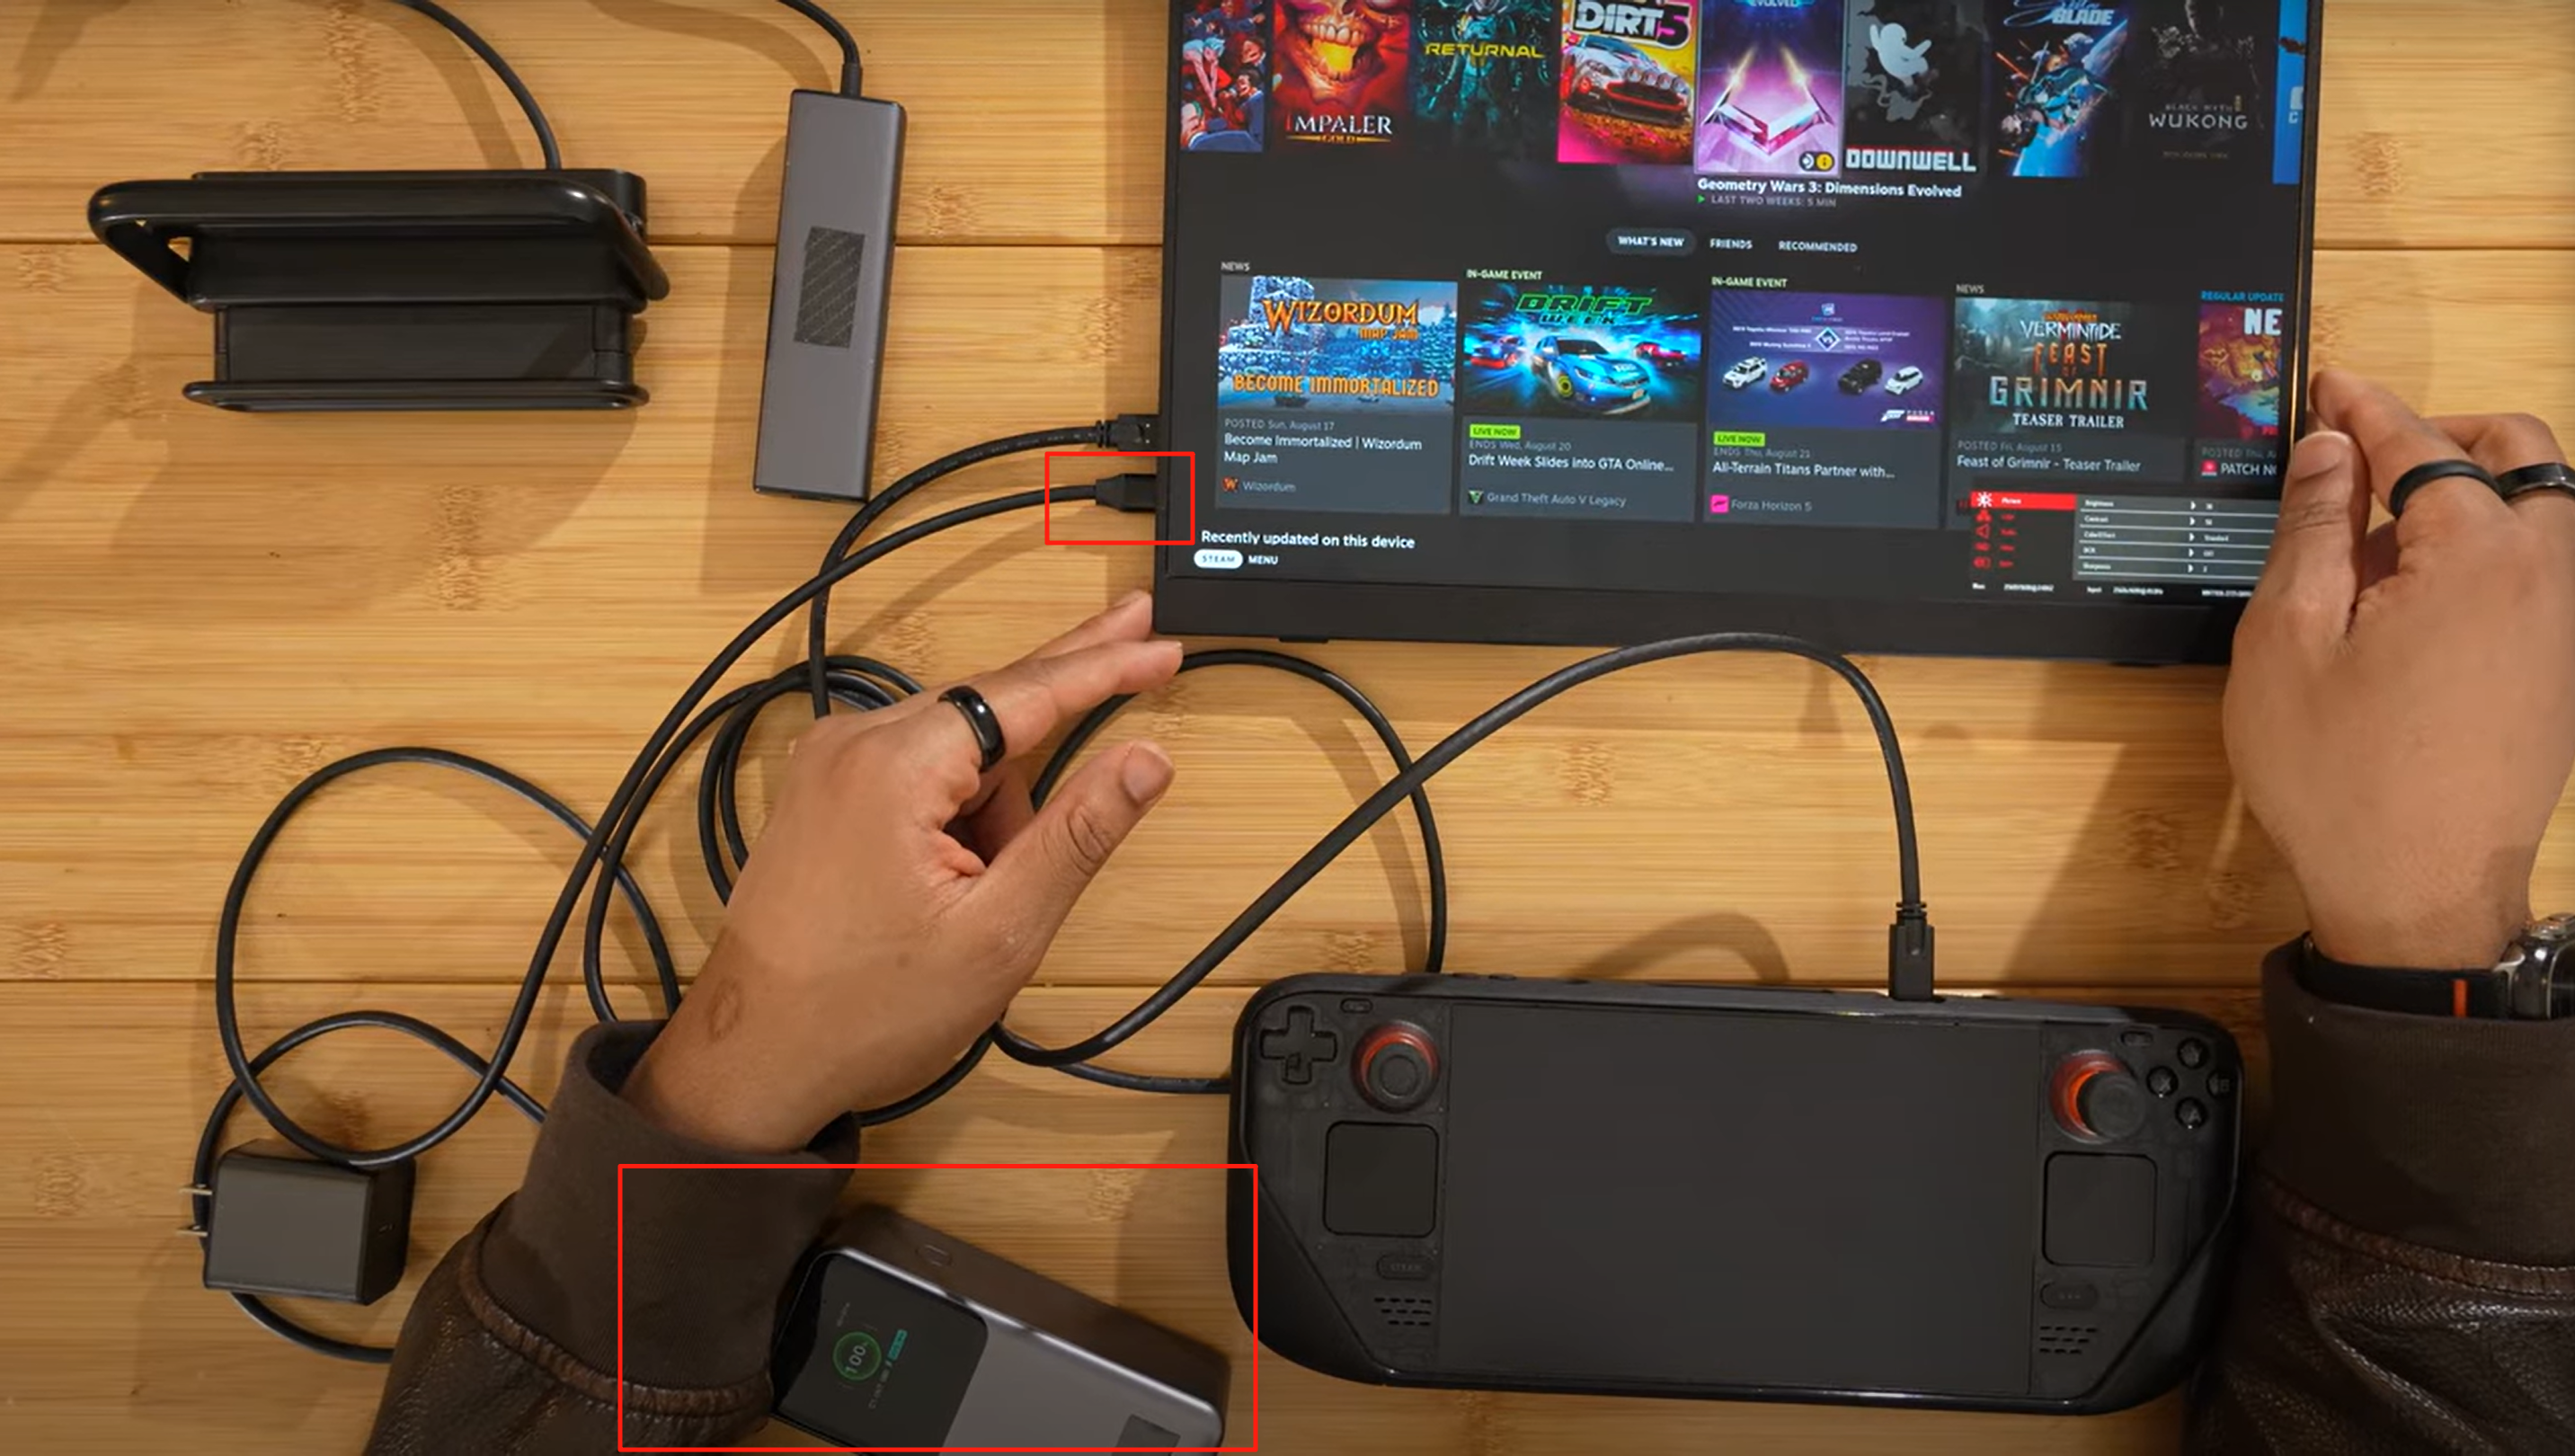
- Charging the Steam Deck:
- You can use the second USB-C port to charge the Steam Deckwhile it’s connected to the monitor by plugging it into a power source (e.g., power bank or power adapter).
Method 2: HDMI Connection with Hub/Dock
If you prefer using an HDMI connection, follow these steps:
- Set up the Dock or Hub:
- Use a USB-C hub or dock to connect the Steam Deck to the monitor via mini HDMI.
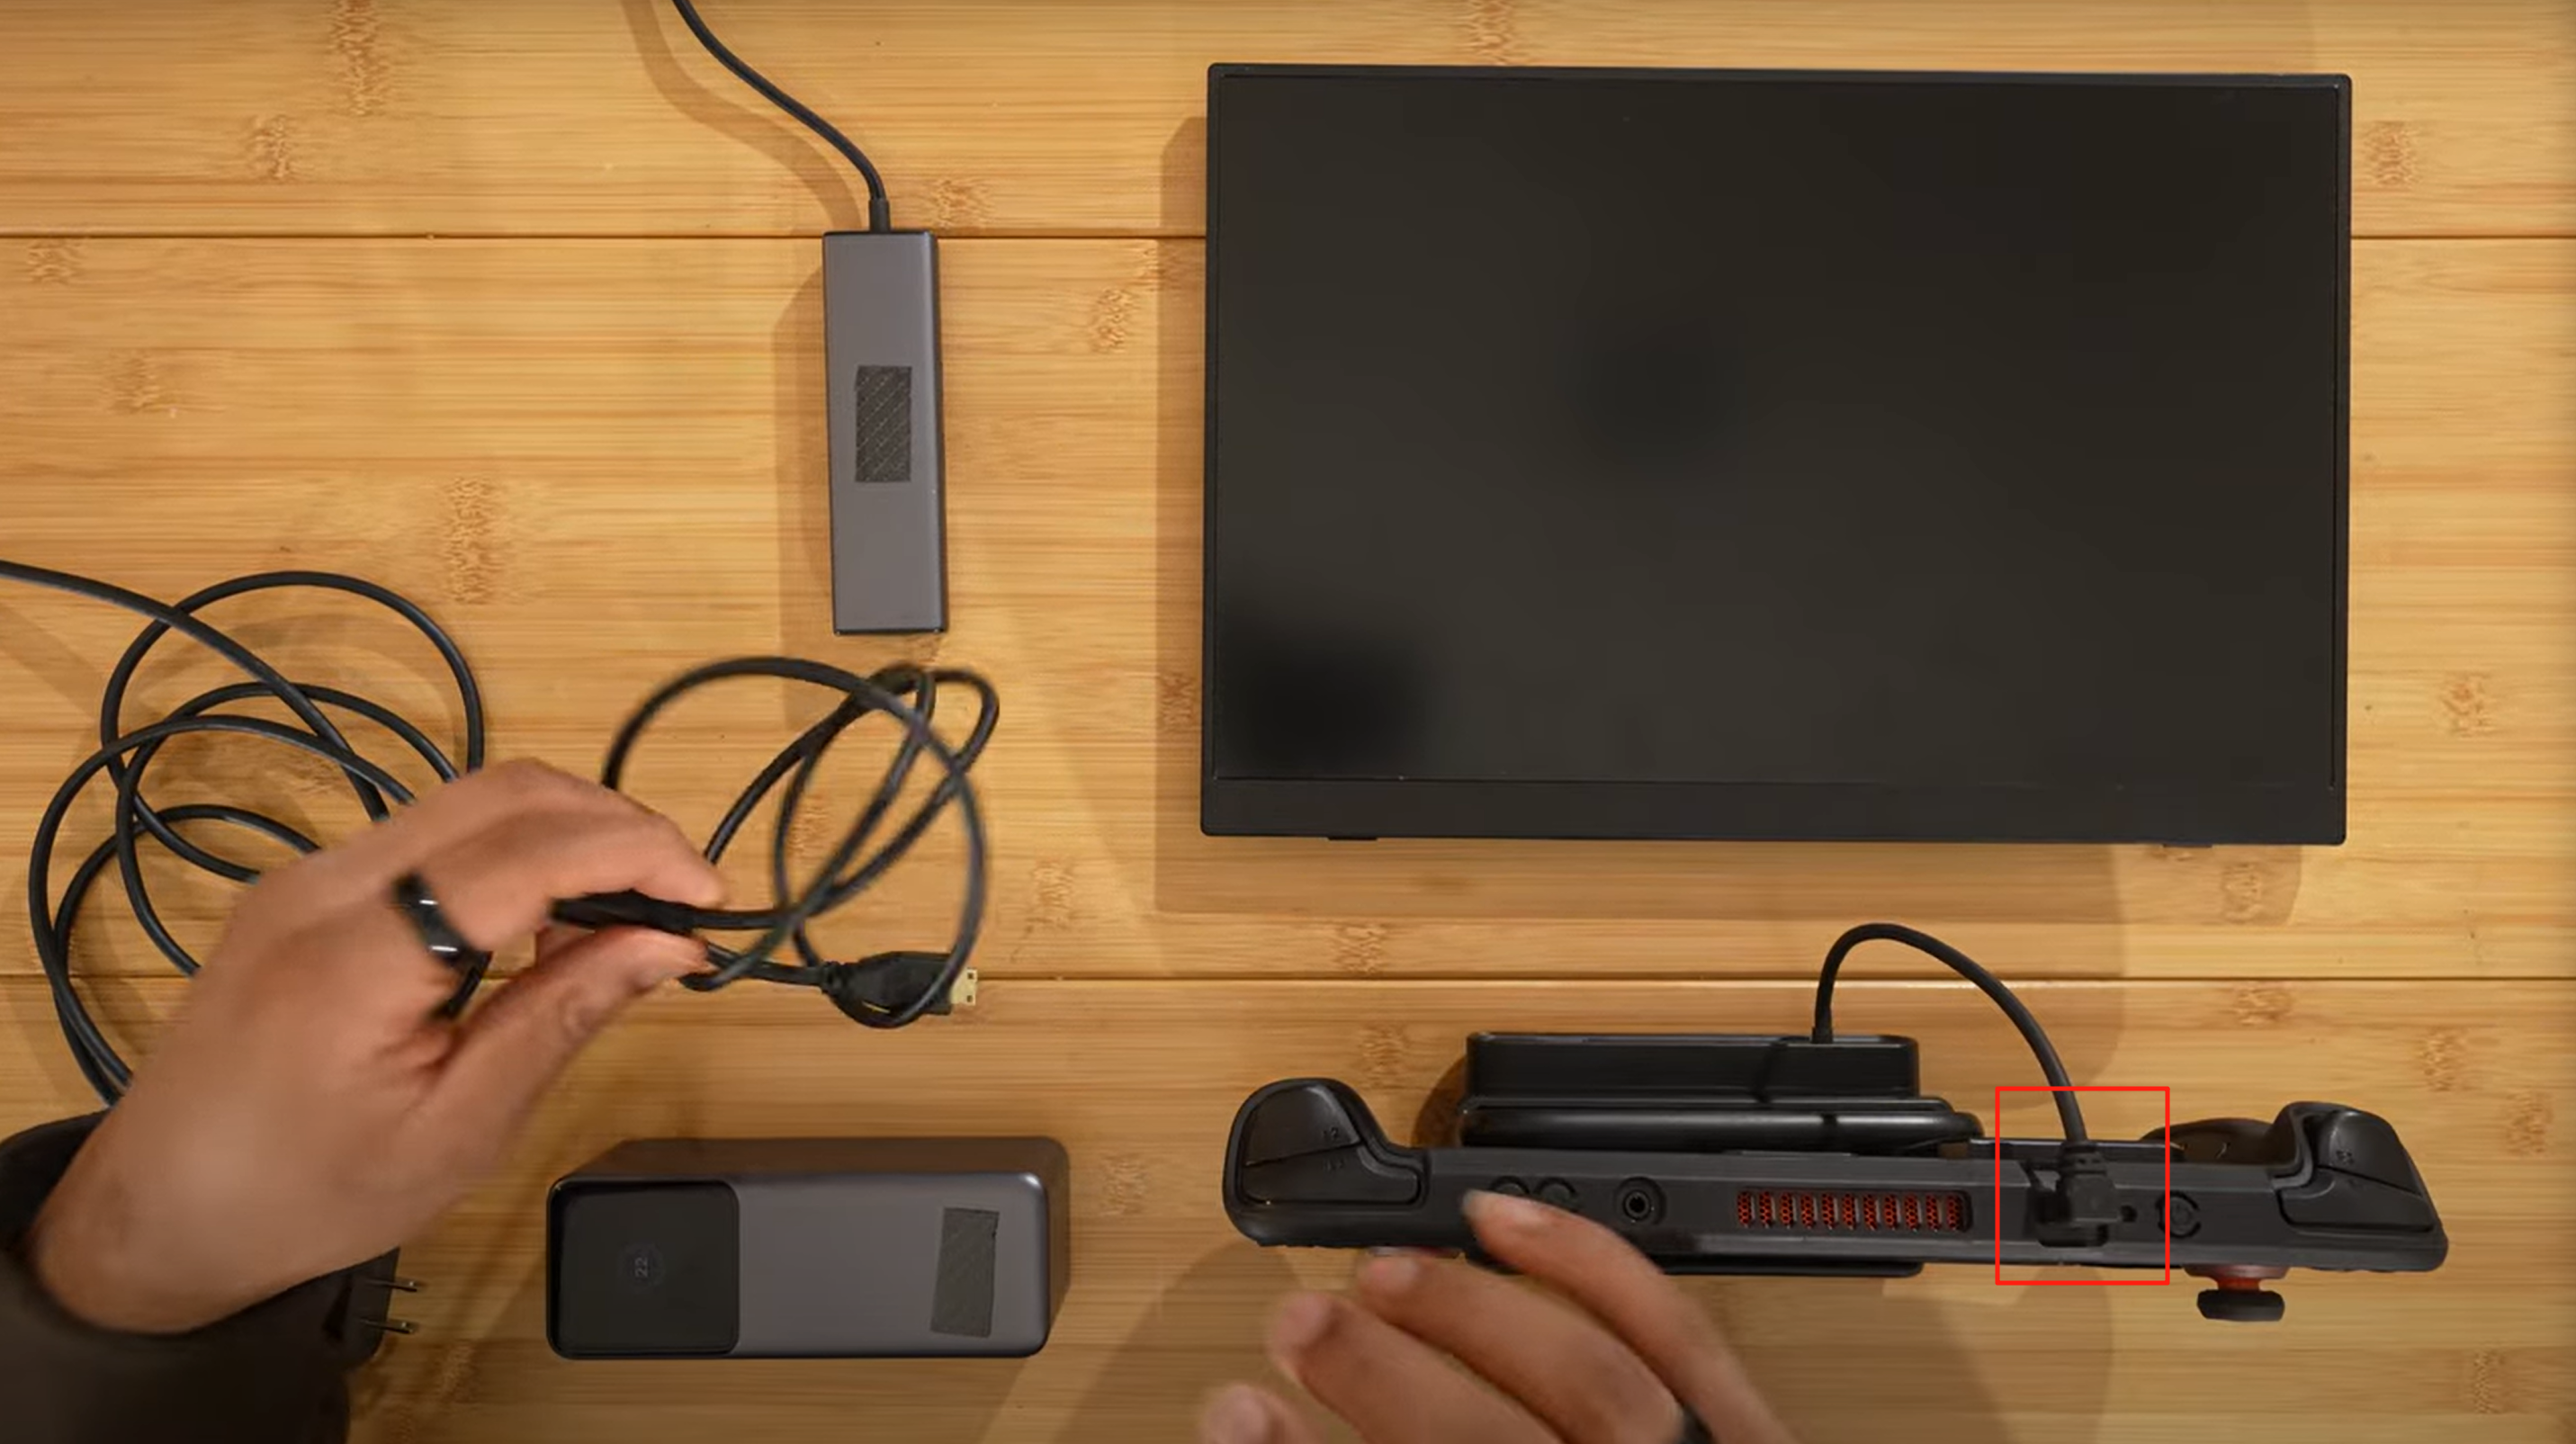
- Connect HDMI Cable:
- Plug the mini HDMI end of the cable into the monitor, and the other end into your dock.

- Power the Monitor:
- The monitor will require external power, so connect it to a power source to activate the HDMI connection.
- Once powered, the display will turn on.
Step 3: Adjusting the Resolution and Refresh Rate
To optimize your display, follow these steps to adjust the resolution and refresh rate:
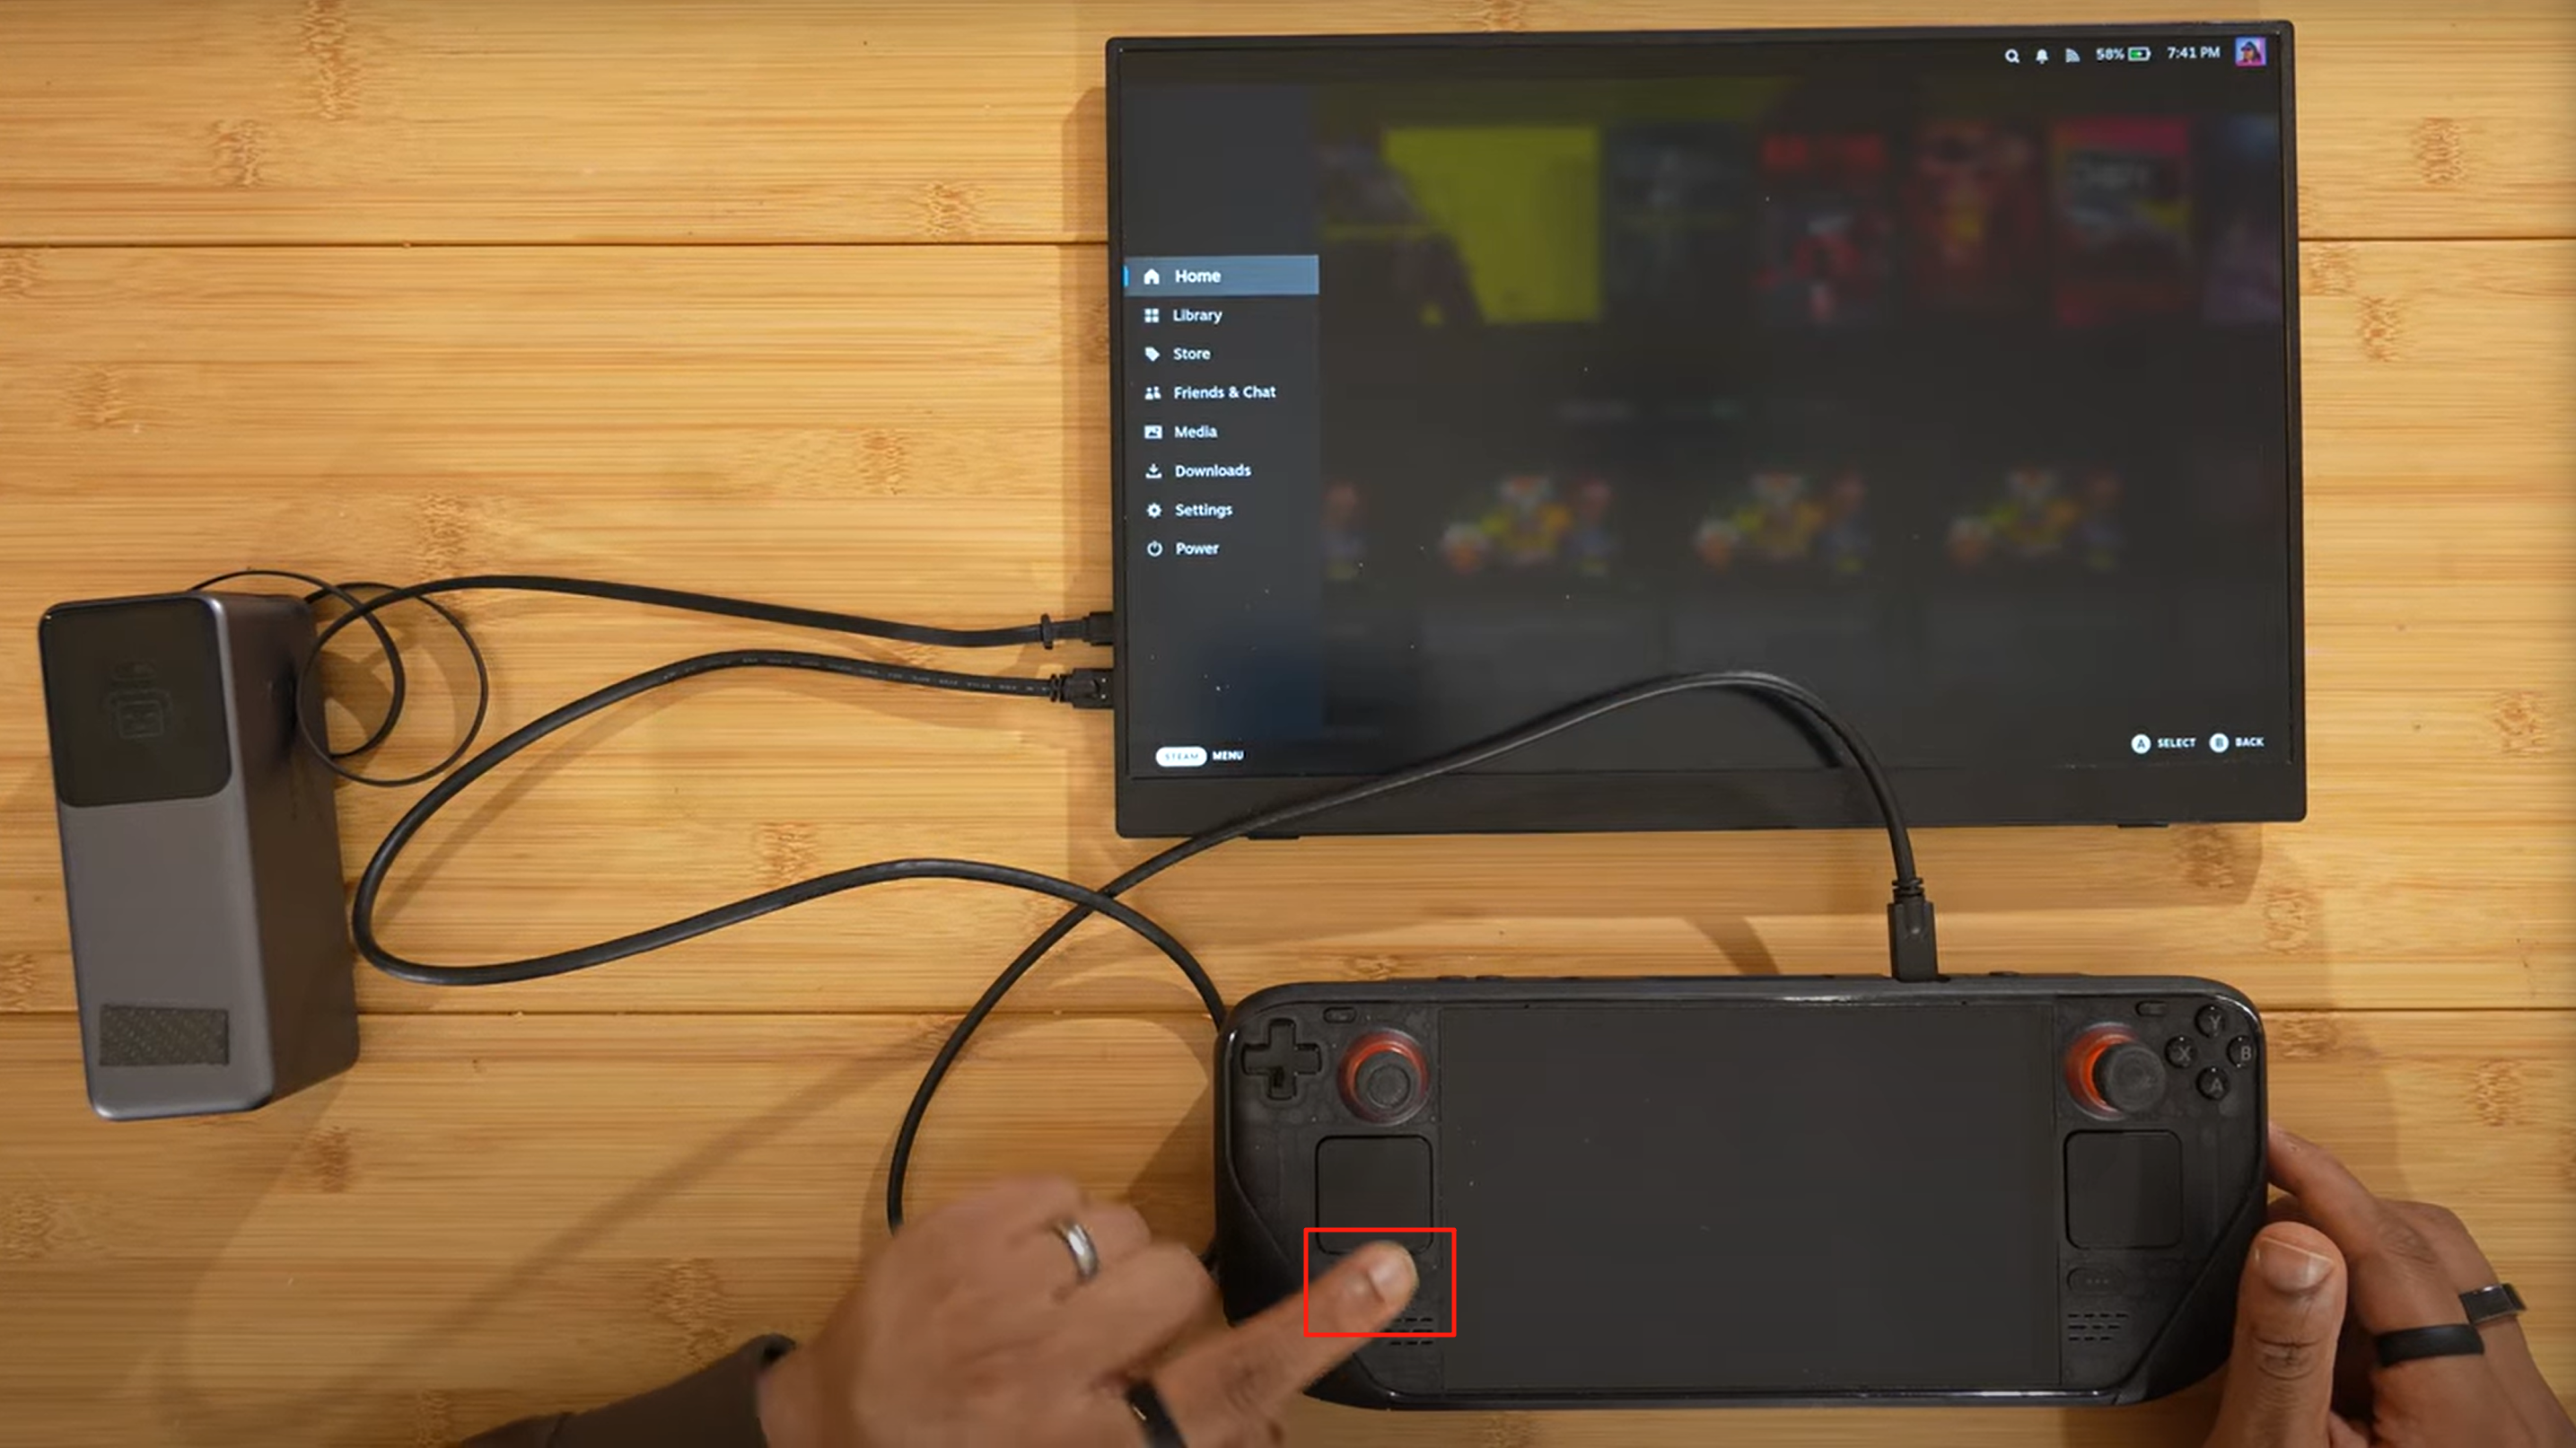
- Open Steam Settings:
- Press the Steam buttonon your Steam Deck to open the Steam menu.
- Go to Settings> Display.


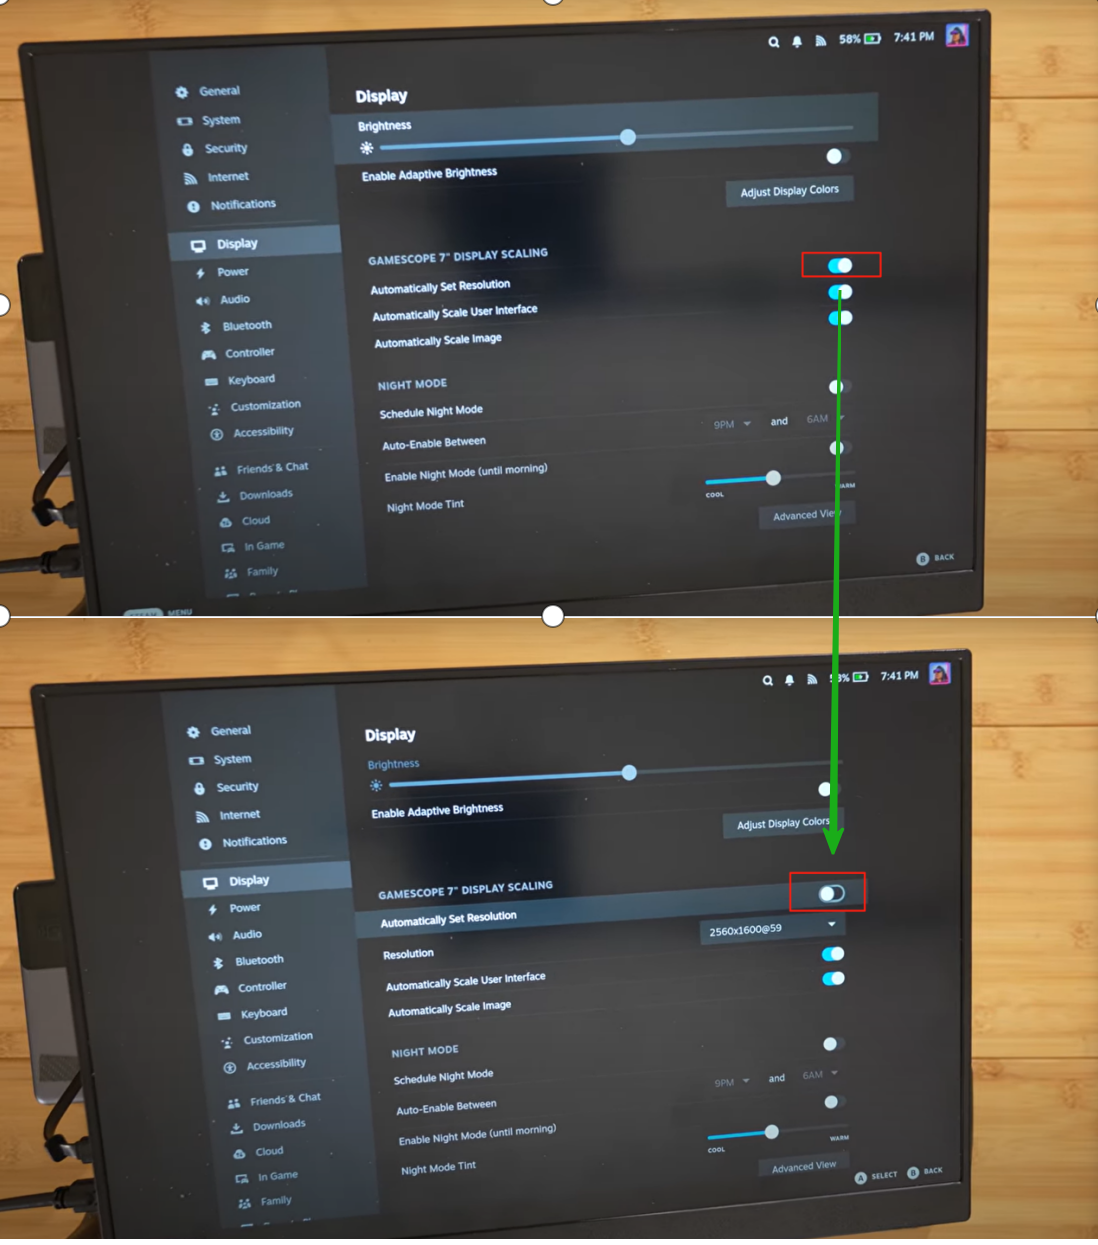
- Disable Automatic Resolution:
- Under the Resolutionsettings, uncheck Automatically set resolution.
- Now you can manually select your desired resolutionand refresh rate.
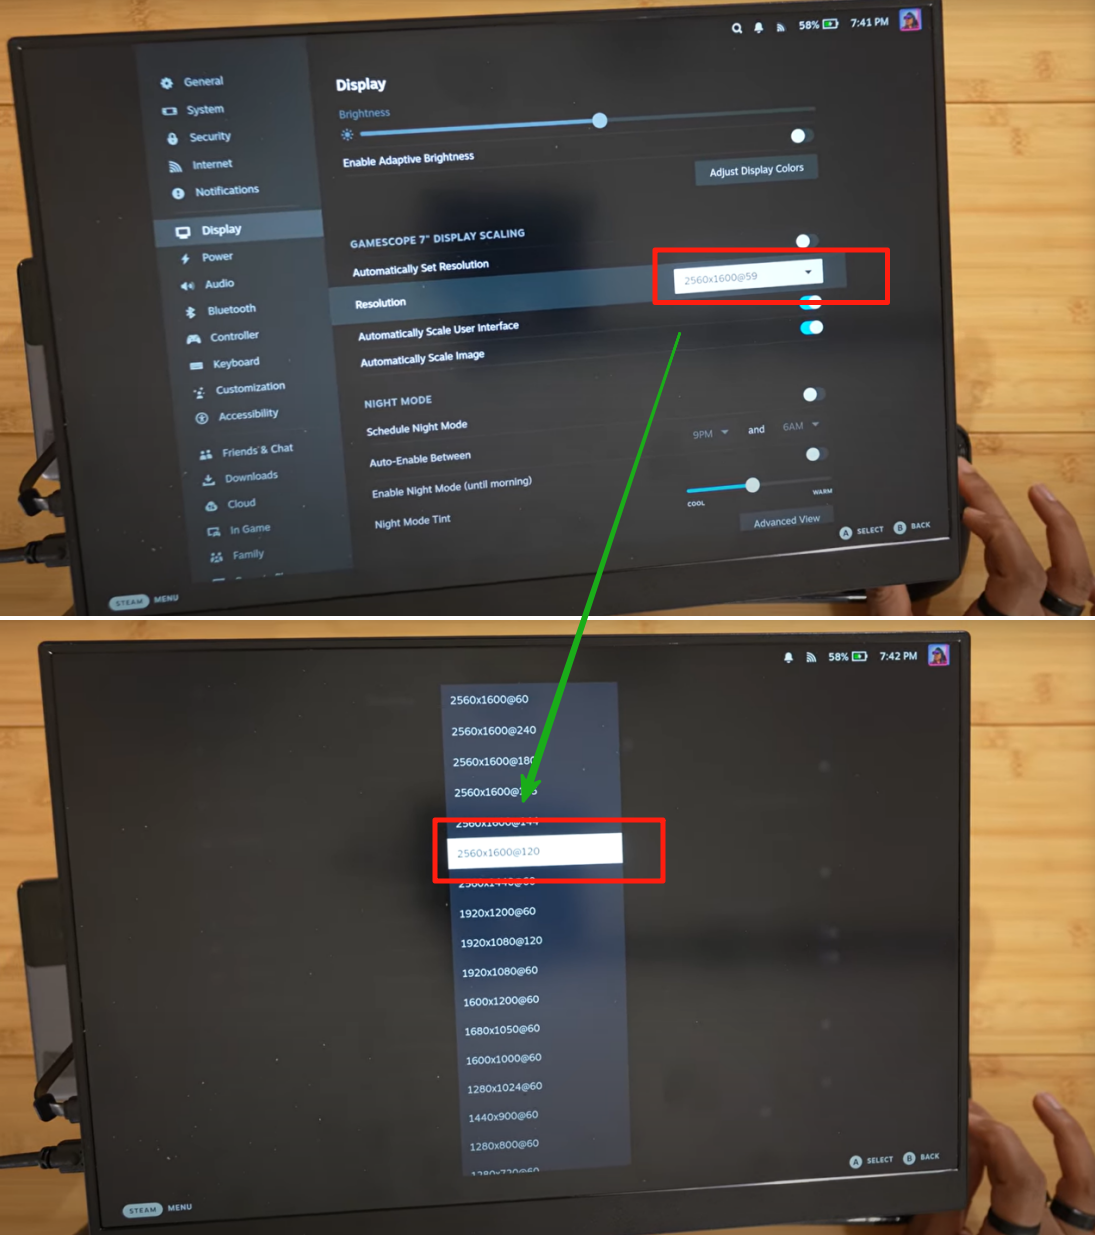
- Choose Your Settings:
- For instance, set the display to 2560 x 600at 120Hz, or choose a higher setting like 1600p at 240Hz based on your preferences.
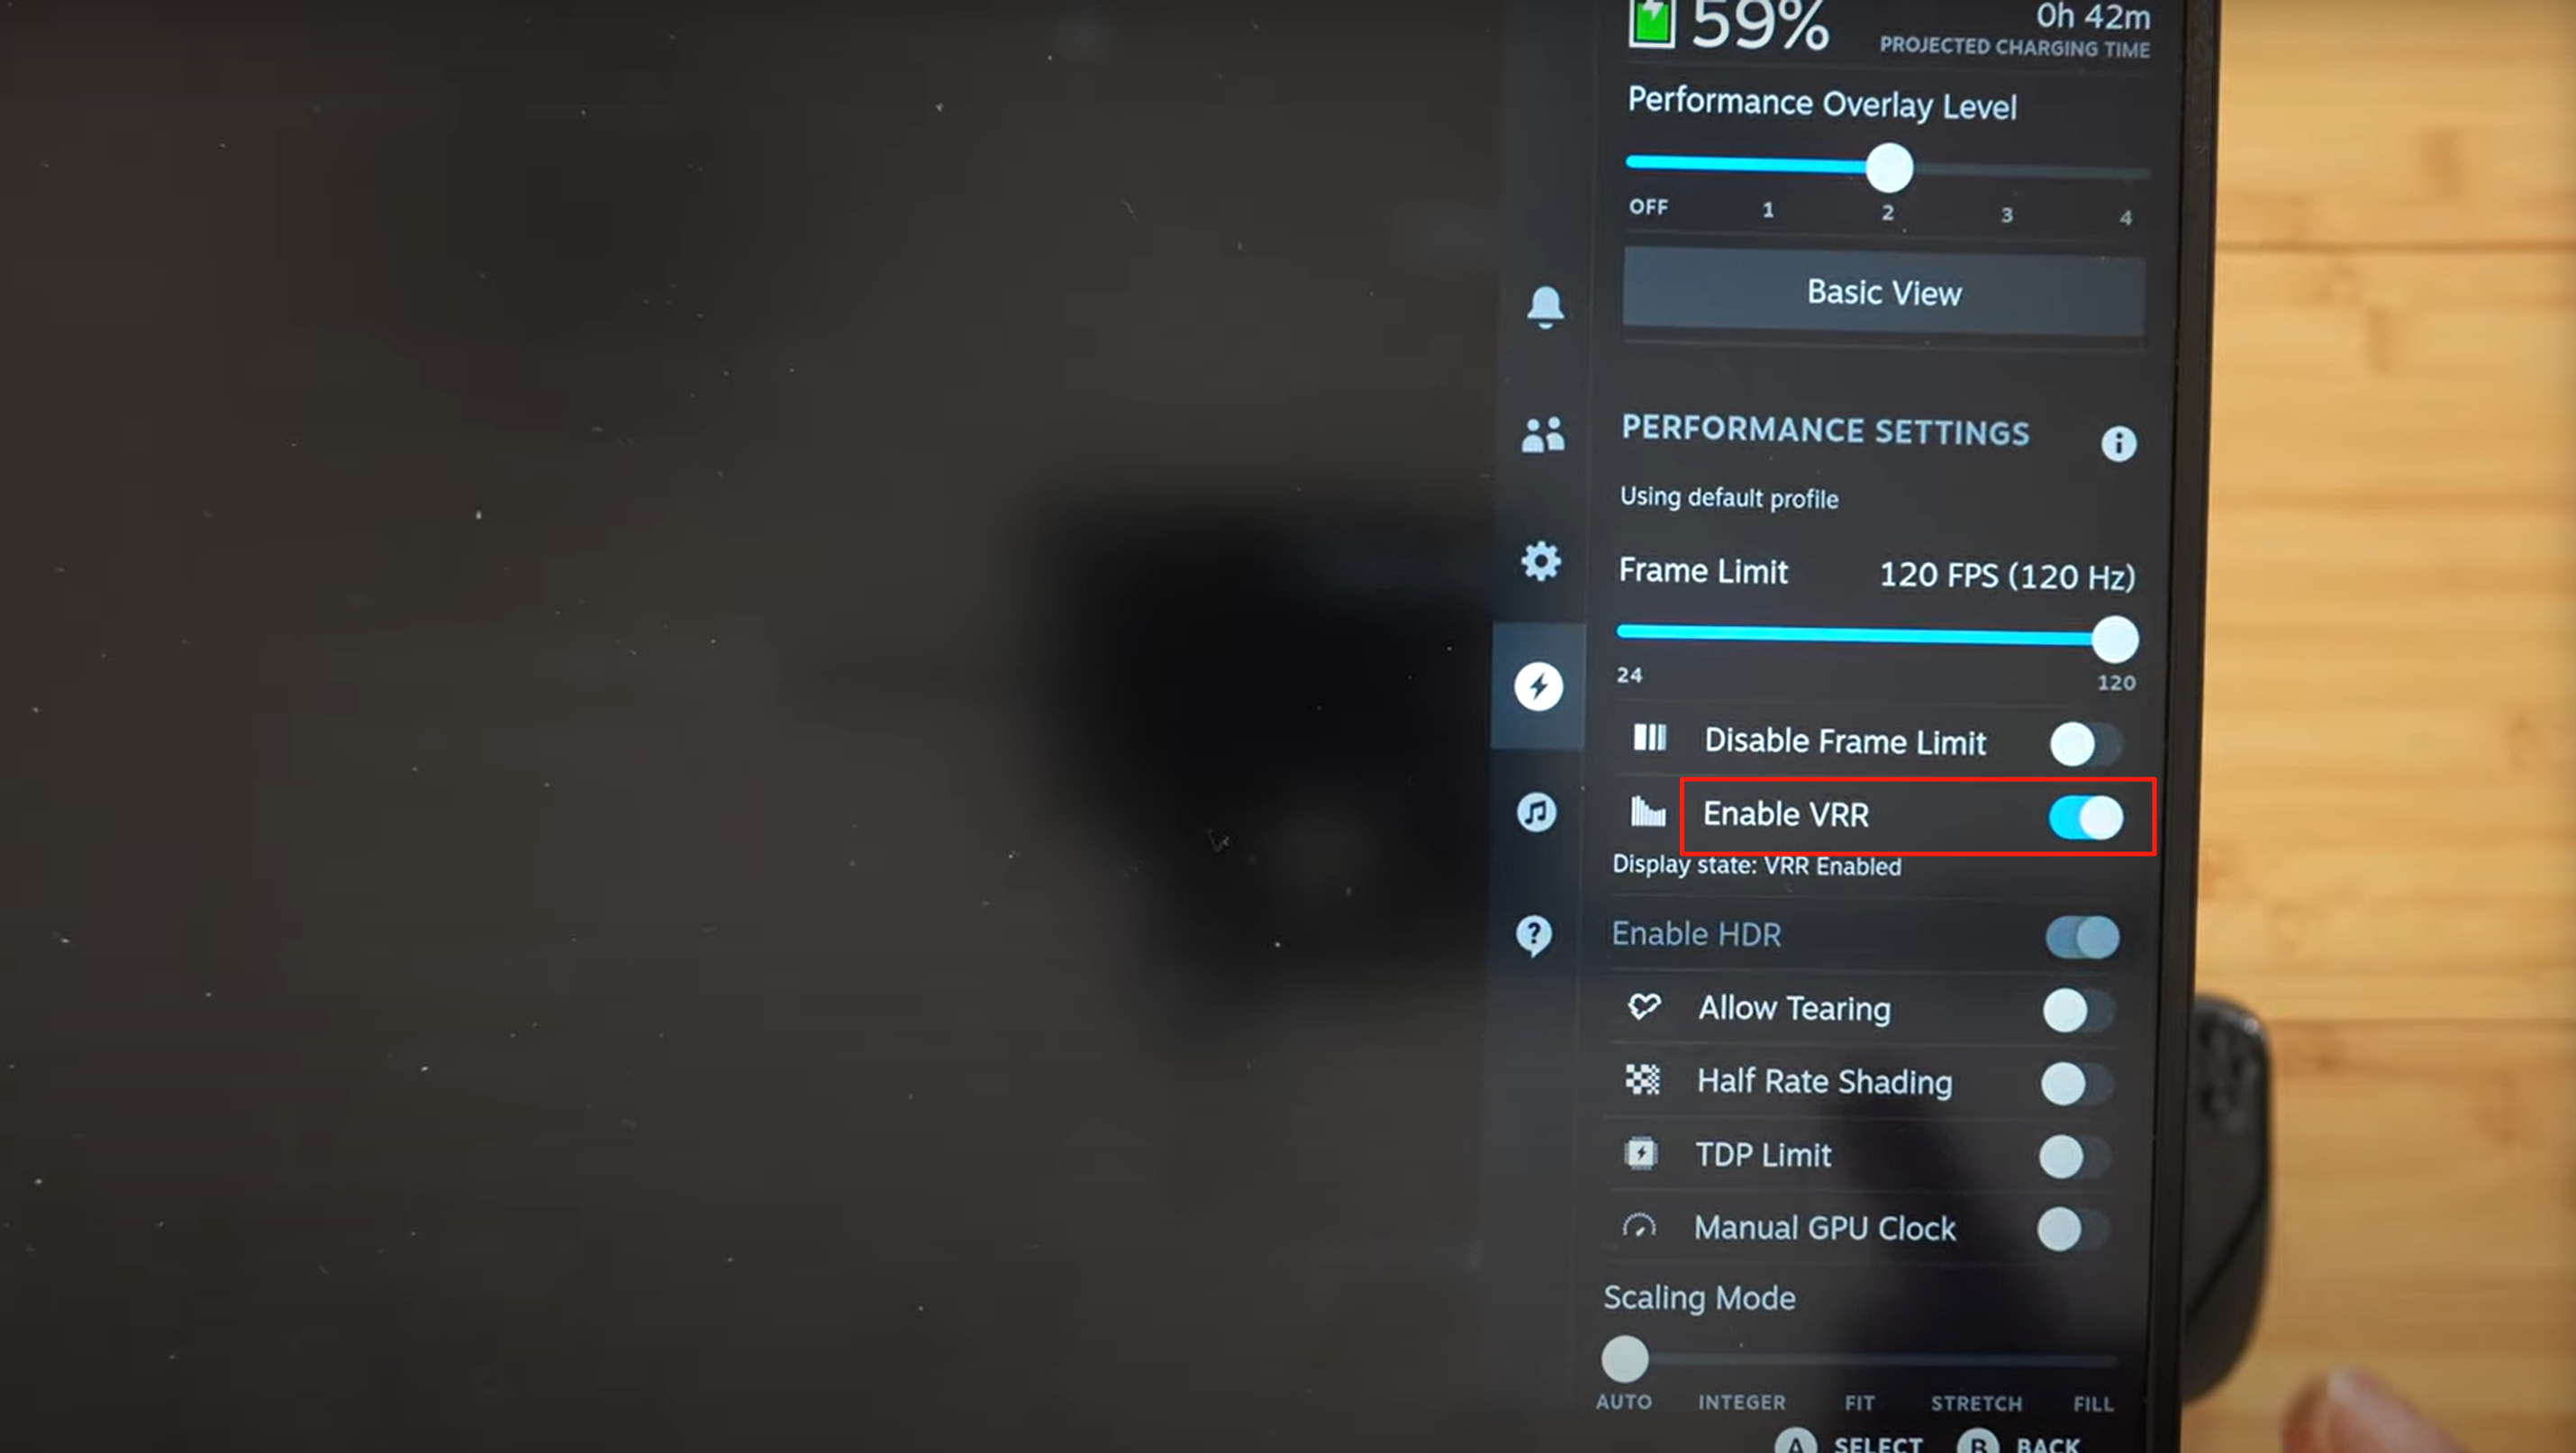
- VRR Settings:
- You can enable Variable Refresh Rate (VRR)for smoother gameplay. Make sure VRR is turned on for a fluid experience.
Step 4: Monitor Menu Settings
The monitor itself has a menu with customizable options. Here's a breakdown:
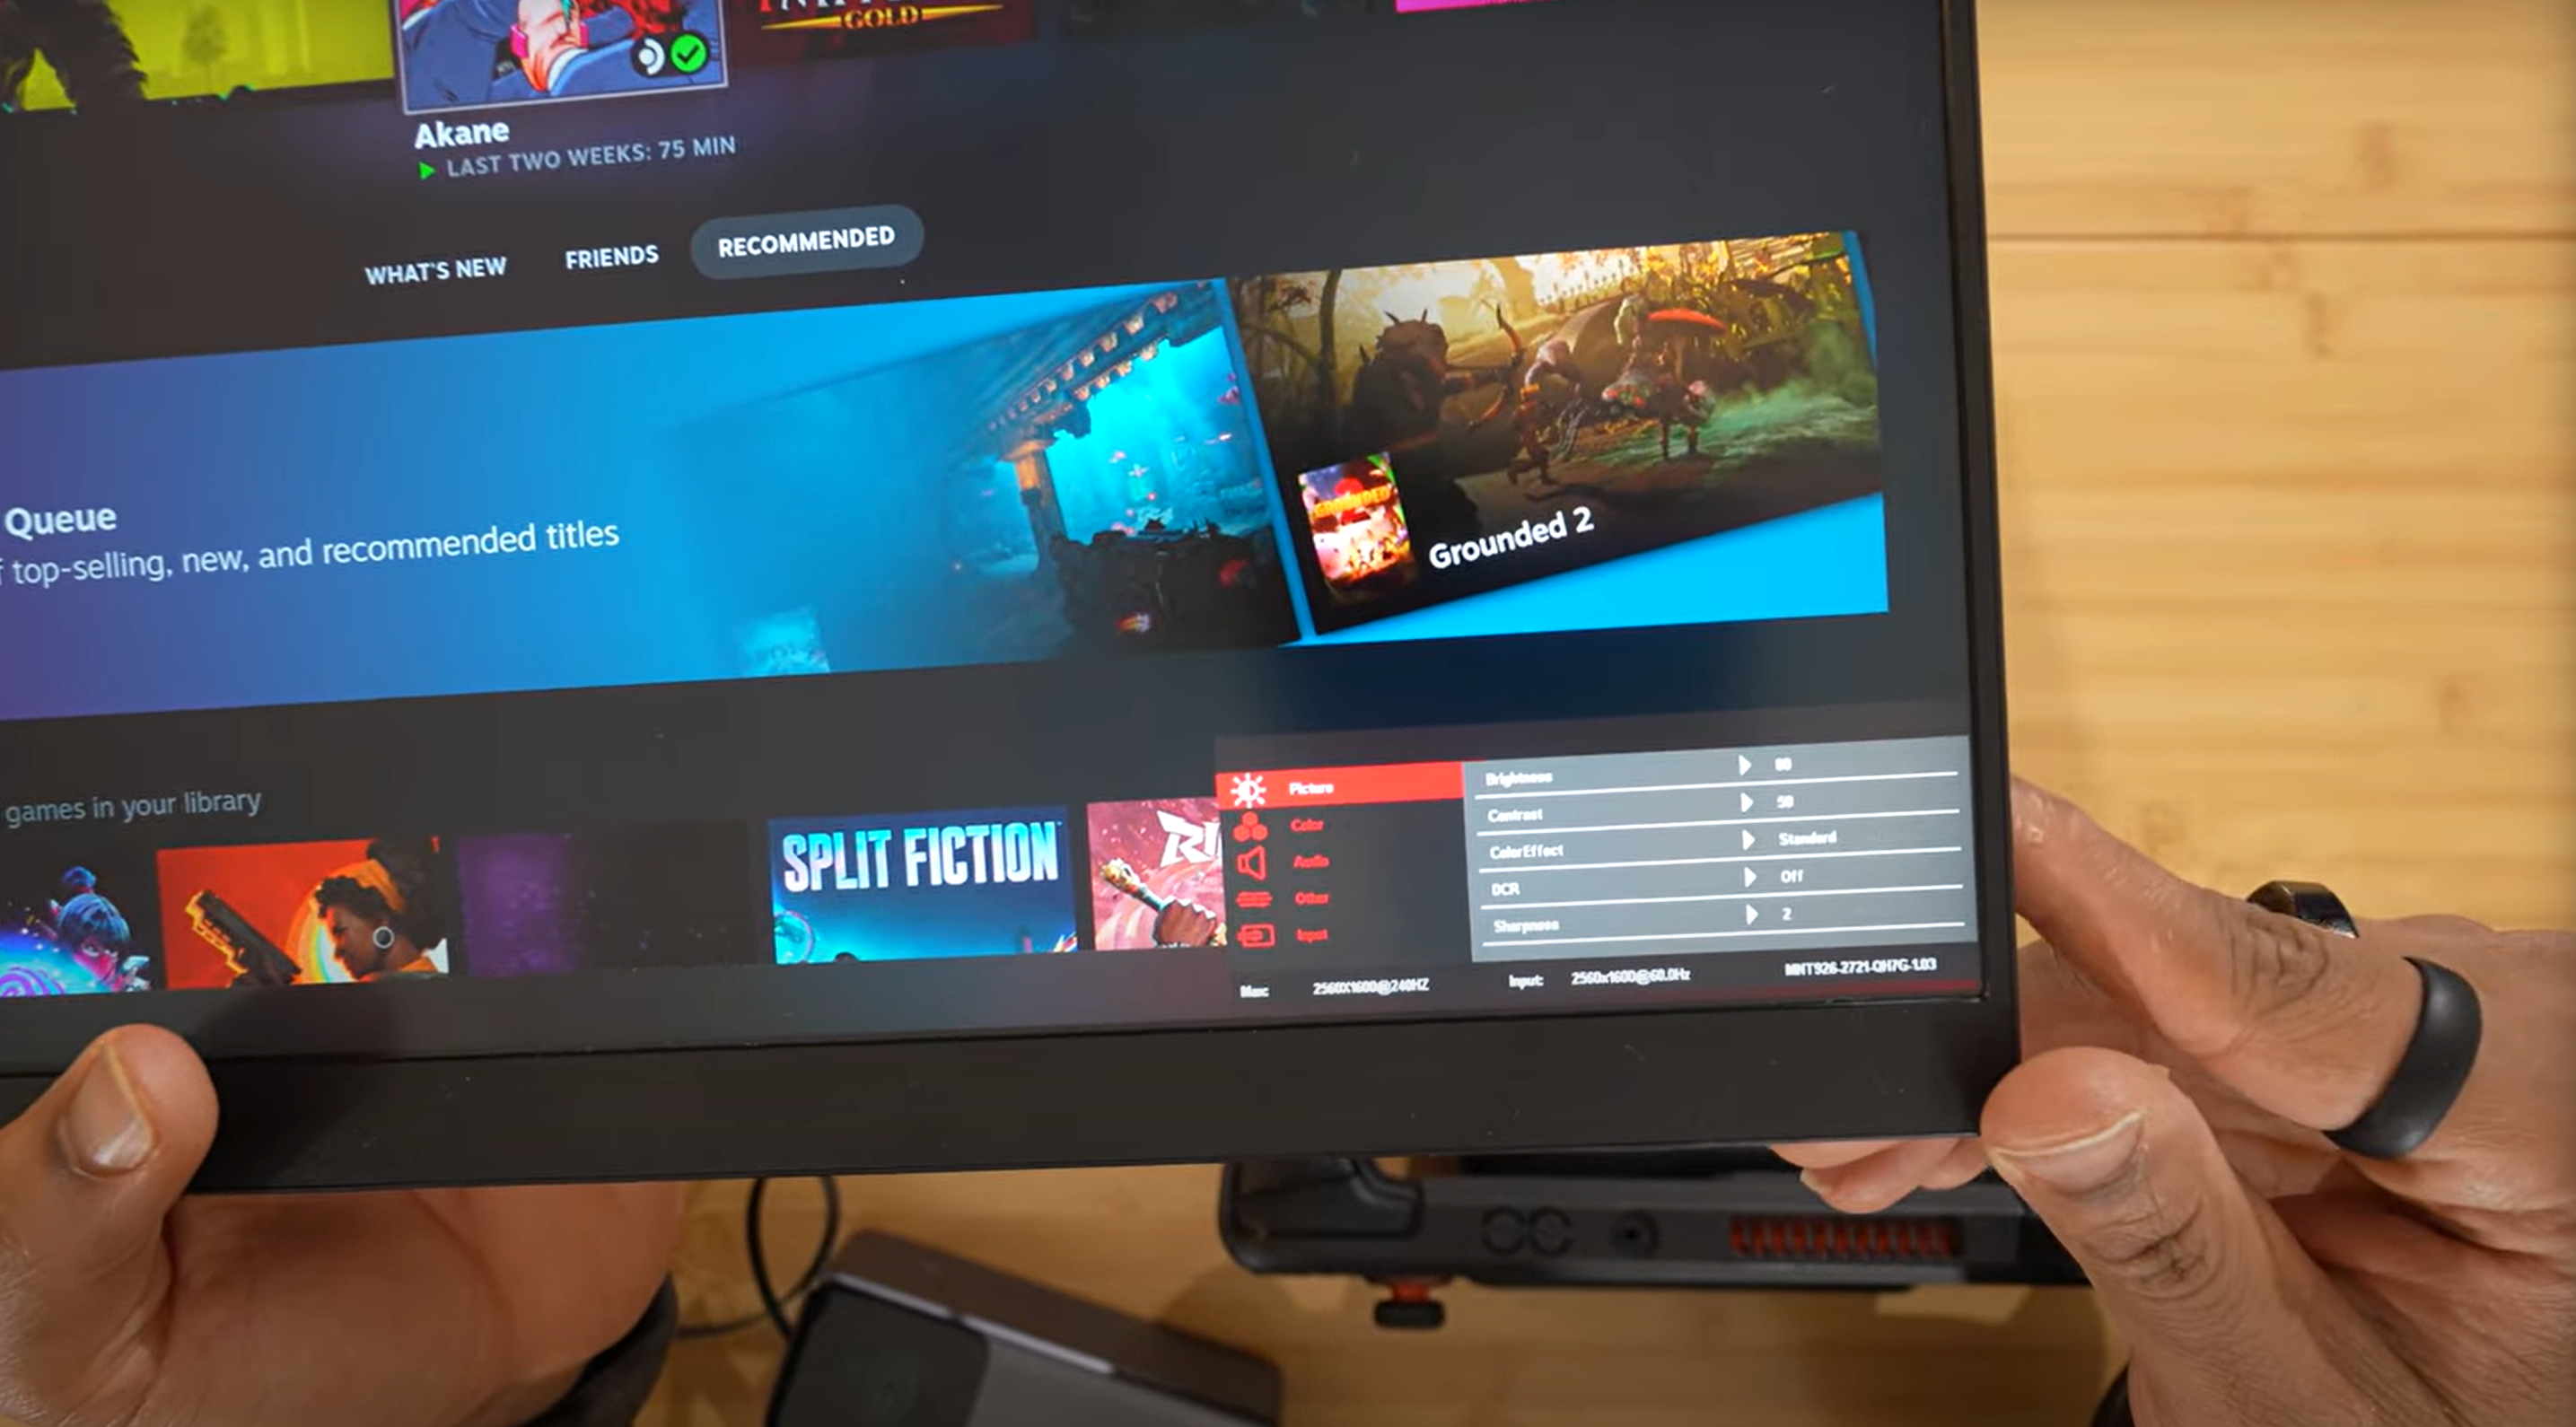
- Picture Settings:
- Brightness: Adjust the brightness for better visibility.
- Contrast: Control contrast for darker and lighter areas.
- Color Effect: Choose settings like Gaming, Movie, Photo, or FPSfor different types of content.
- Sharpness: Fine-tune the sharpness for a clearer picture.
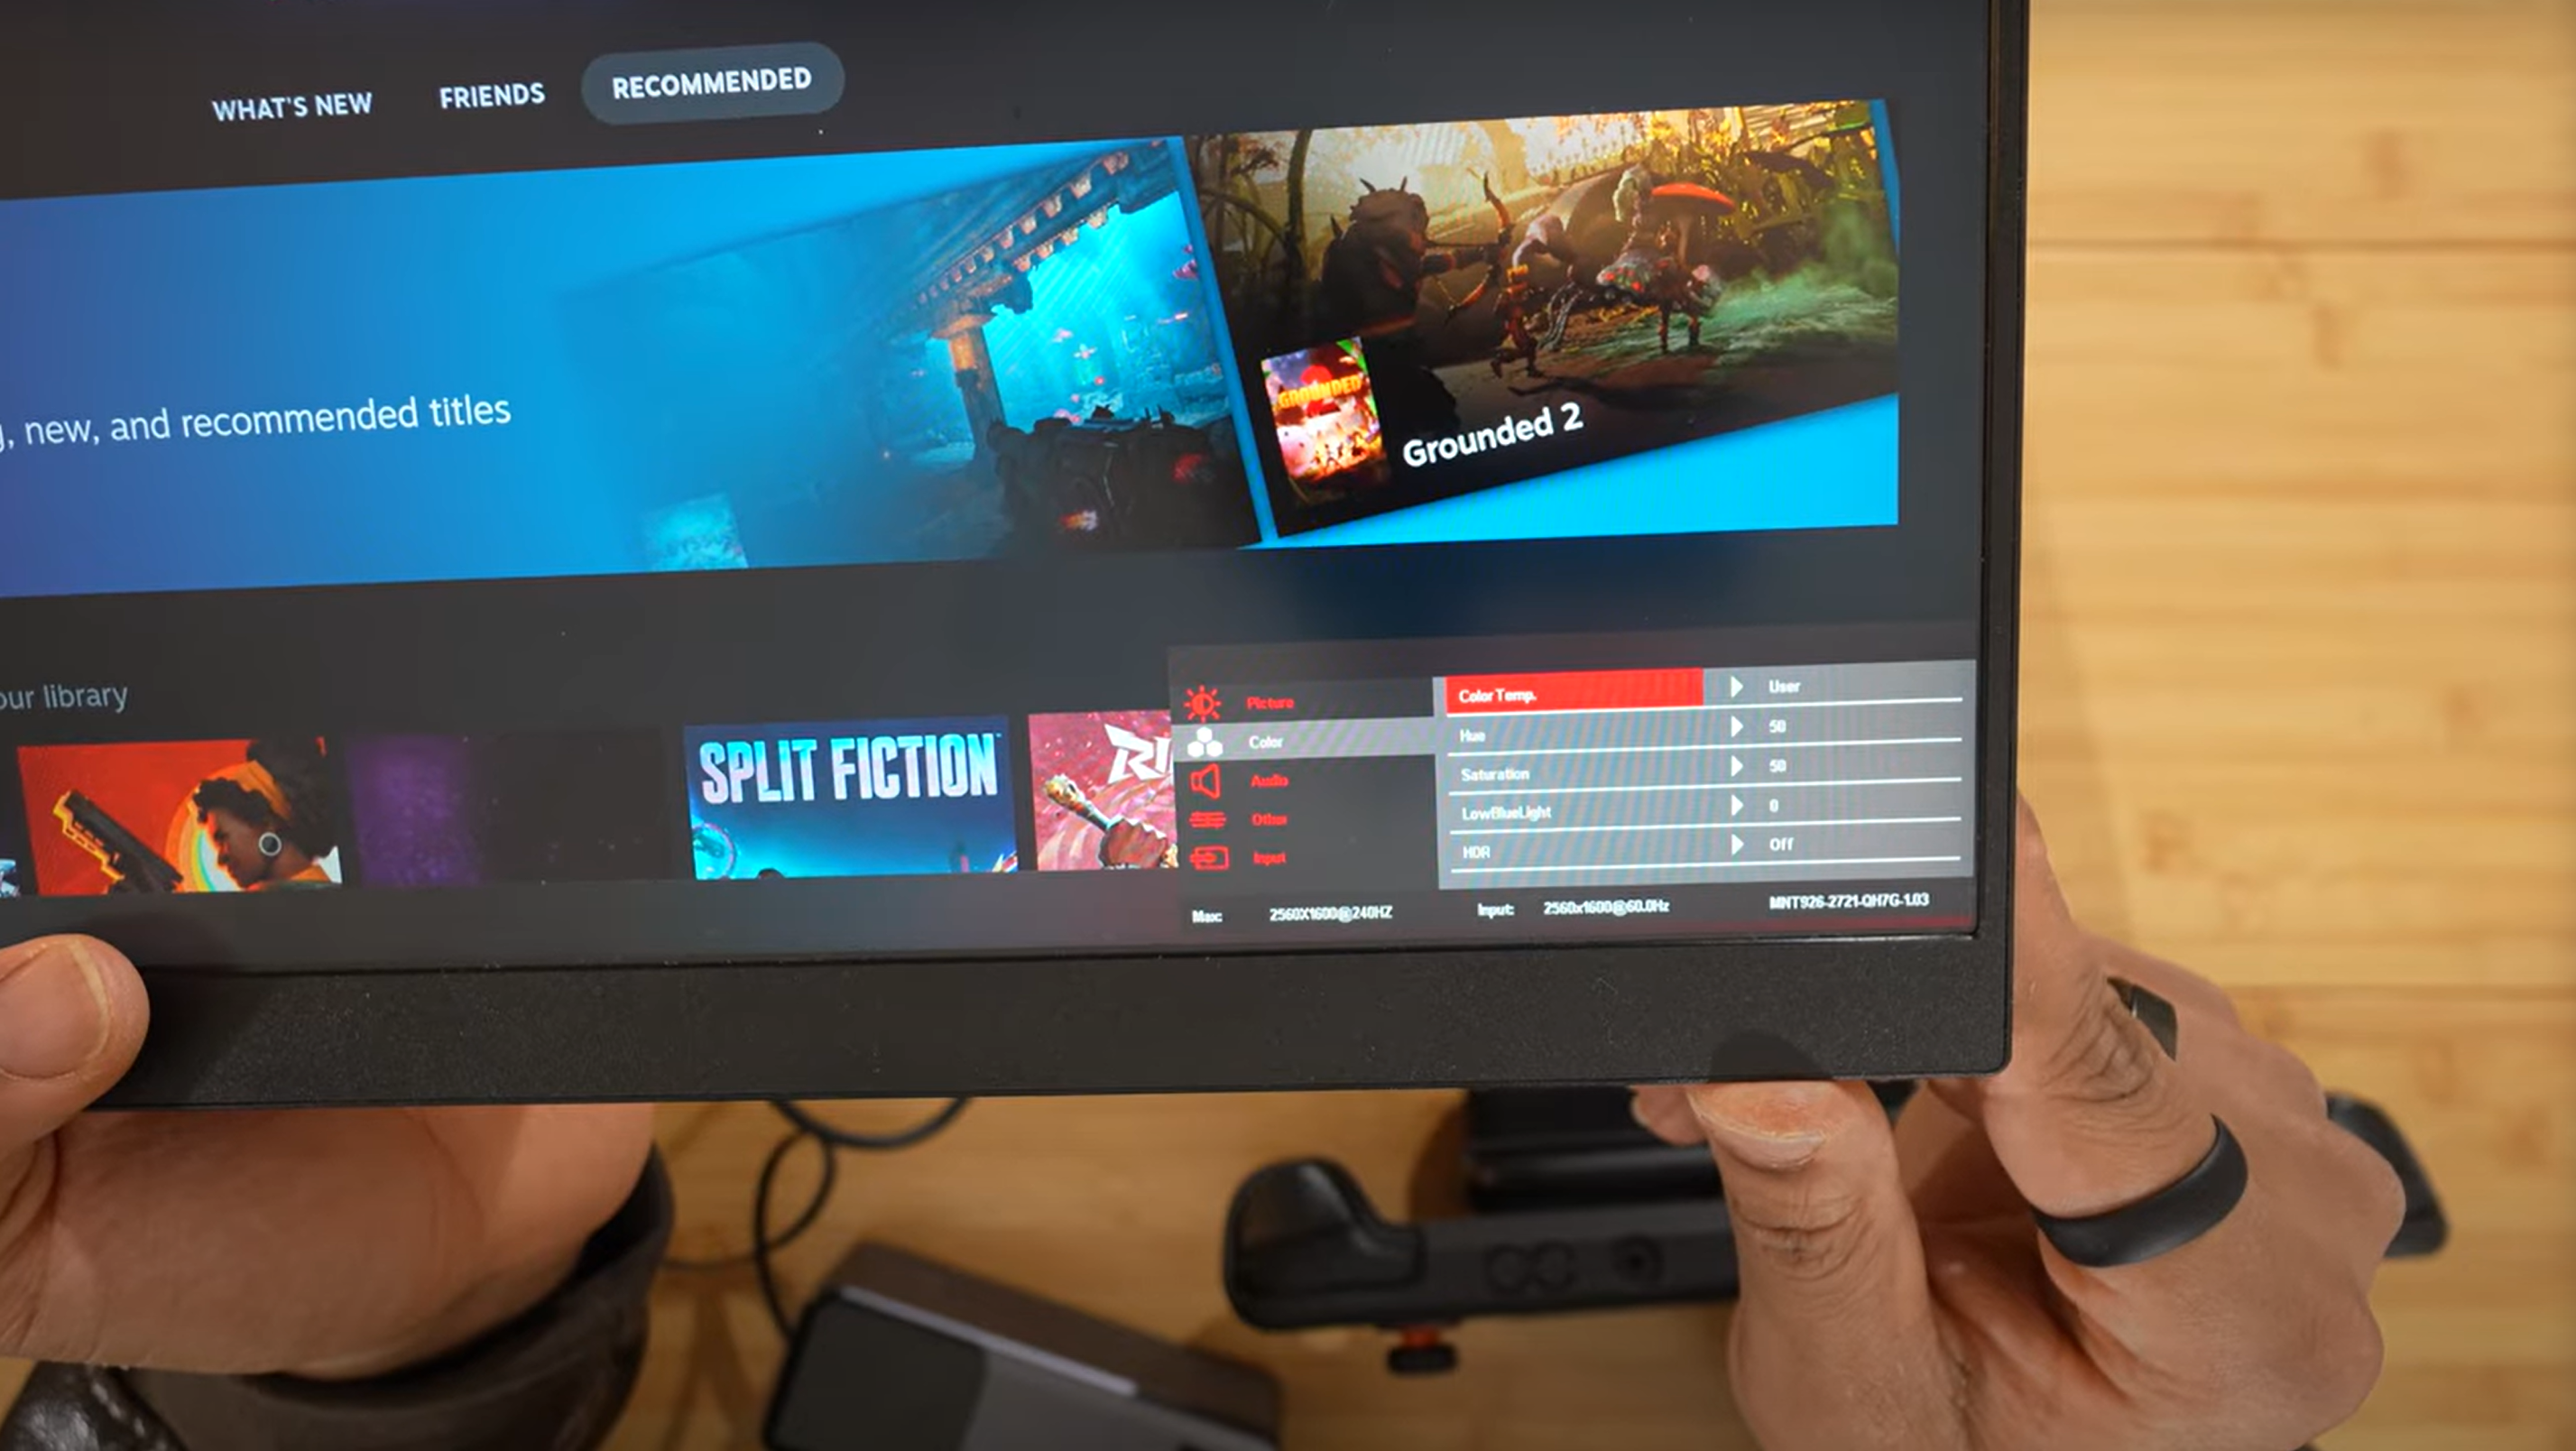
- Color Settings:
- Color Temperature: Adjust how colors are displayed.
- Saturation: Increase the intensity of colors for a more vibrant look.
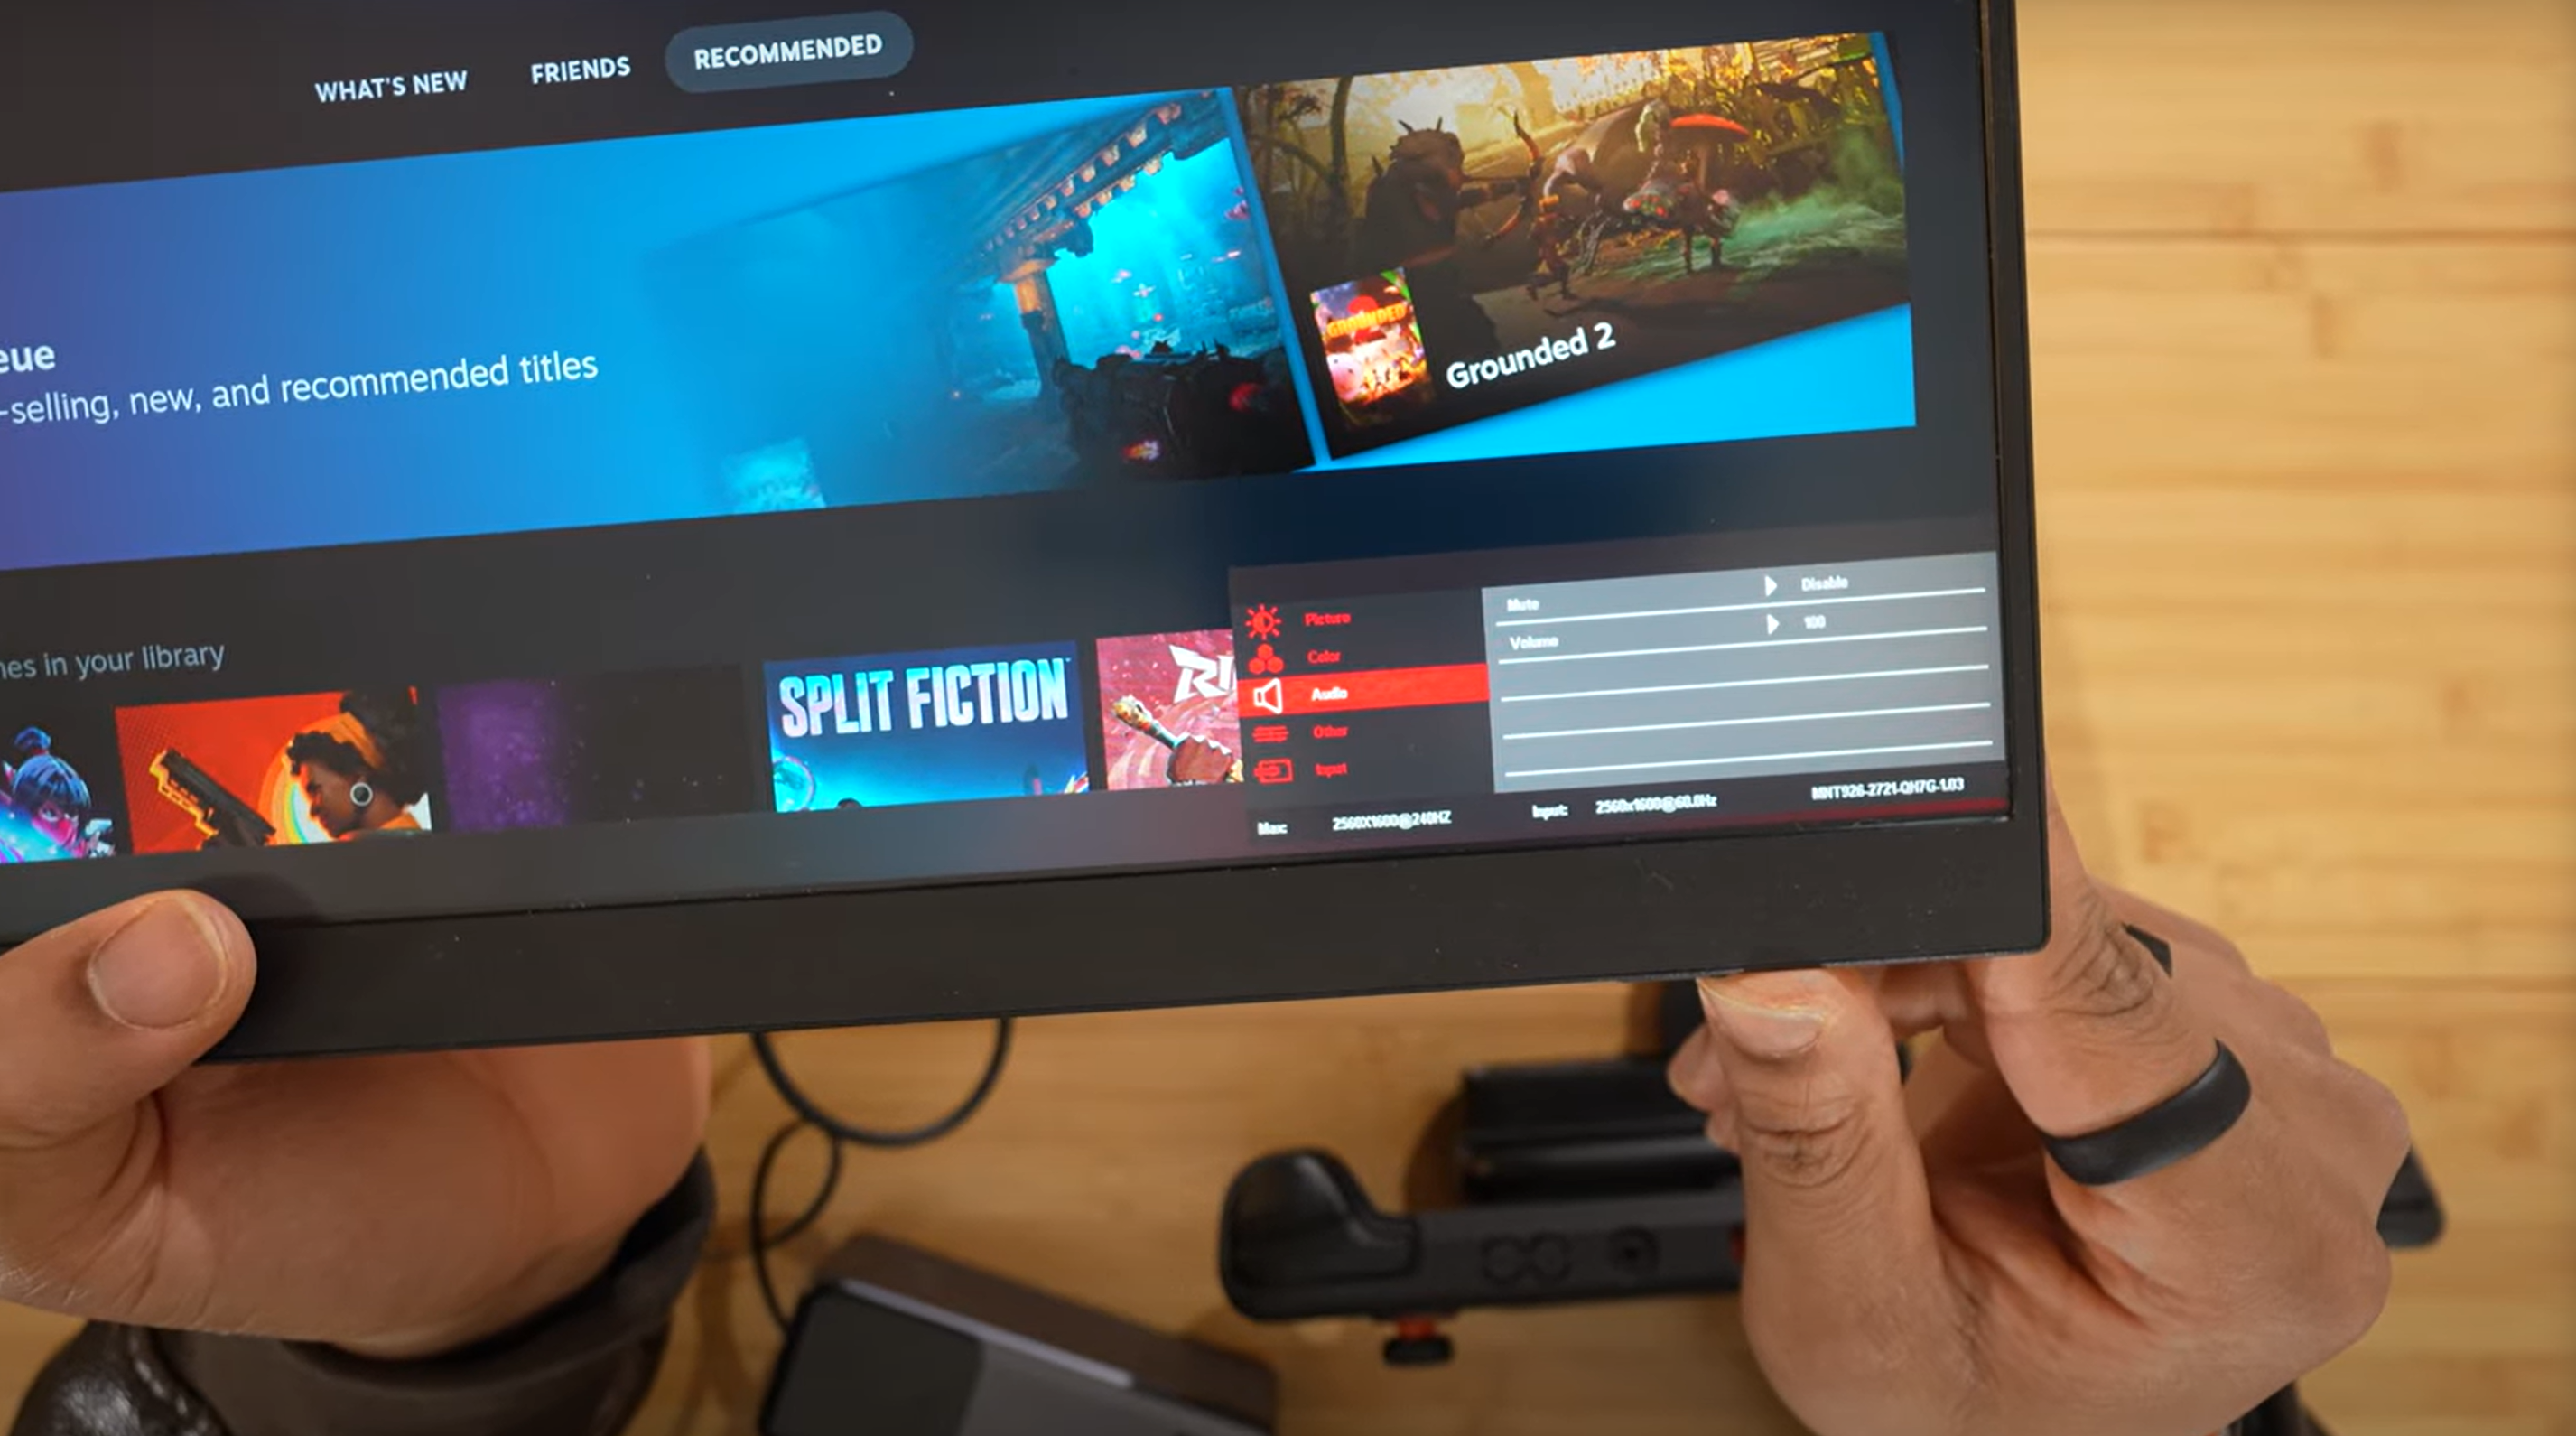
- Volume:
- The monitor has built-in speakers, and you can adjust the volume directly from the menu.
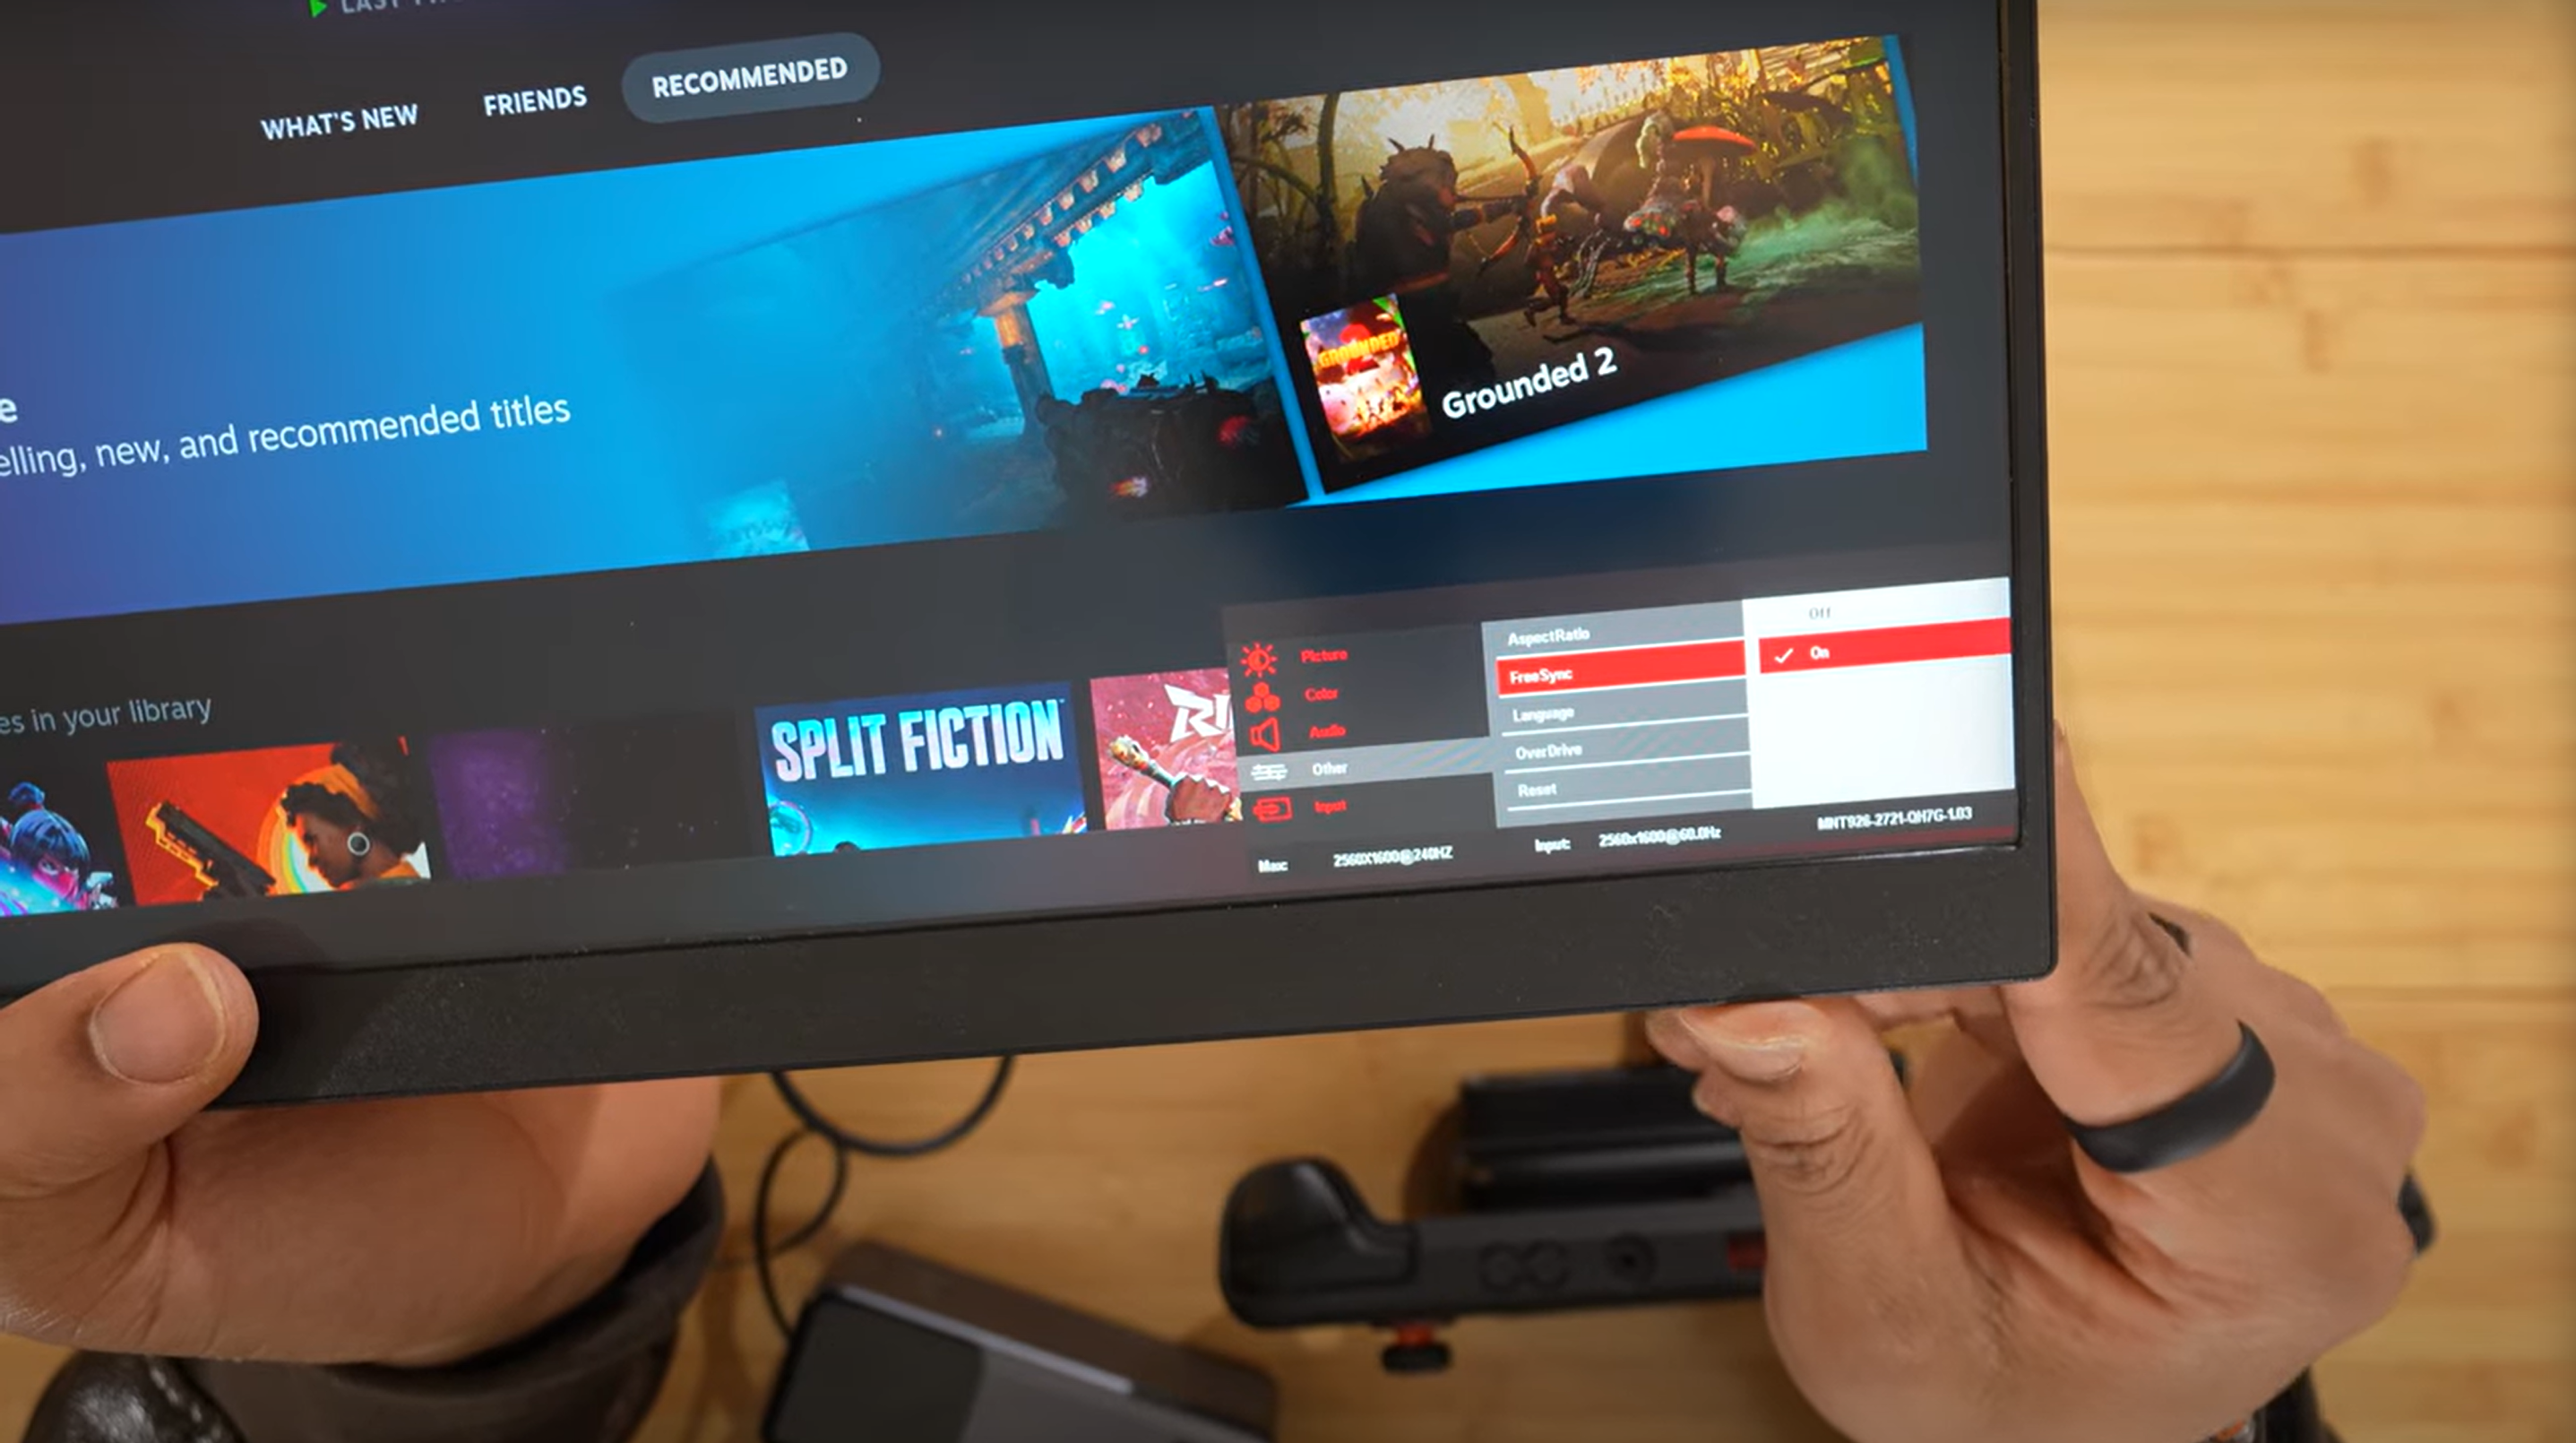
- FreeSync:
- Ensure FreeSyncis enabled for smooth gaming, especially for high-refresh-rate settings.
Conclusion
By these steps, you can easily connect your Steam Deck to the UGame C2 Pro portable monitor. Whether you use a USB-C cable or an HDMI connection with a hub, you'll be able to enjoy a smooth gaming experience with a customized display.
The UGame C2 Pro offers great functionality, and adjusting the settings for resolution, refresh rate, and display preferences makes it even better. Happy gaming!